Creating End-to-End MLOps pipelines using Azure ML and Azure Pipelines
In this 7-part series of posts we’ll be creating a minimal, repeatable MLOps Pipeline using Azure ML and Azure Pipelines.
The git repository that accompanies these posts can be found here.
In this series we’ll be covering:
- Part 1 – Introduction
- Part 2 – Resource Set Up
- Part 3 – Data Pipeline
- Part 4 – Environment Pipeline
- Part 5 – Model Training Pipeline
- Part 6 – Model Deployment Pipeline
- Part 7 – Continuous Integration (CI) Pipeline
Quick disclaimer: At the time of writing, I am currently a Microsoft Employee
Part 3 – Data Pipeline
In this part we’ll look at setting up our first Azure Pipeline.
This pipeline will be a data pipeline to create data and upload it to Azure Blob Storage. This datastore will then be registered with Azure Machine Learning ready for using in our model training pipeline.
In this example, this data will be simple and static, but this could be a continuously updating dataset that would undergo a more complex ETL pipeline at this stage that we can use to re-train models.
We’ll set this up as a daily pipeline, as if our data was being updated daily.
Pipeline definition
Our Azure Pipeline will be set up as a yaml file.
In our git repository, this can be found in the root of the repository as data_pipeline.yml.
Let’s take a look at this yaml file and then we’ll explain what’s happening at each step:
trigger: none

schedules:
  - cron: "0 0 * * *"
    displayName: "Daily midnight data pipeline run"
    branches:
      include:
      - master
    always: true

name: 'data_pipeline'
jobs:
  - job: 'data_pipeline_job'
    pool:
      vmImage: 'ubuntu-latest'
    variables:
      - group: KeyVault
      - group: ProductionEnvVars
    steps:
      - task: UsePythonVersion@0
        inputs:
          versionSpec: '3.7'
          architecture: 'x64'

      - script: |
          python -m pip install --upgrade pip
          pip install -r requirements.txt
        displayName: 'Install requirements'

      - script: |
          python src/my_custom_package/create_data.py
        displayName: 'Create and Register Data'
        env:
          STORAGE_ACCT_NAME: $(StorageAccountName)
          STORAGE_ACCT_KEY: $(StorageAccountKey)
          TENANT_ID: $(TenantID)
          SPN_ID: $(SpnID)
          SPN_PASSWORD: $(SpnPassword)
          AML_WORKSPACE_NAME: $(AmlWorkspaceName)
          RESOURCE_GROUP: $(ResourceGroup)
          SUBSCRIPTION_ID: $(SubscriptionID)
So if we take a dive into at what’s happening here:
Schedules
First, the CI trigger is turned off, so that this Pipeline isn’t run every time the code is updated.
There is a cron schedule that runs at 00:00 every day on the master branch. This is run regardless of whether there are any code changes, because there may be data changes.
Jobs
We have set up a pipeline with a single stage, with a single job.
The VM image being used is an Ubuntu 16.04 image.
Variables are extracted from the variable groups we set up in our resource set up in Azure DevOps.
Steps
Python 3.7.6 is being used here. You can define a strategy in which you use multiple python versions (and multiple operating systems) but in this case we’re just using one version of python on one OS.
In the second step, we upgrade pip and install the requirements for our pipeline using the requirements.txt file found in the root of our repository.
In the final step we run the python file at src/my_custom_package/create_data.py in our repository. In the section below, we’ll take a look at what this file is doing.
Note at this last step that we are extracting variables from our variable groups and assigning them as environment variables for this script to use.
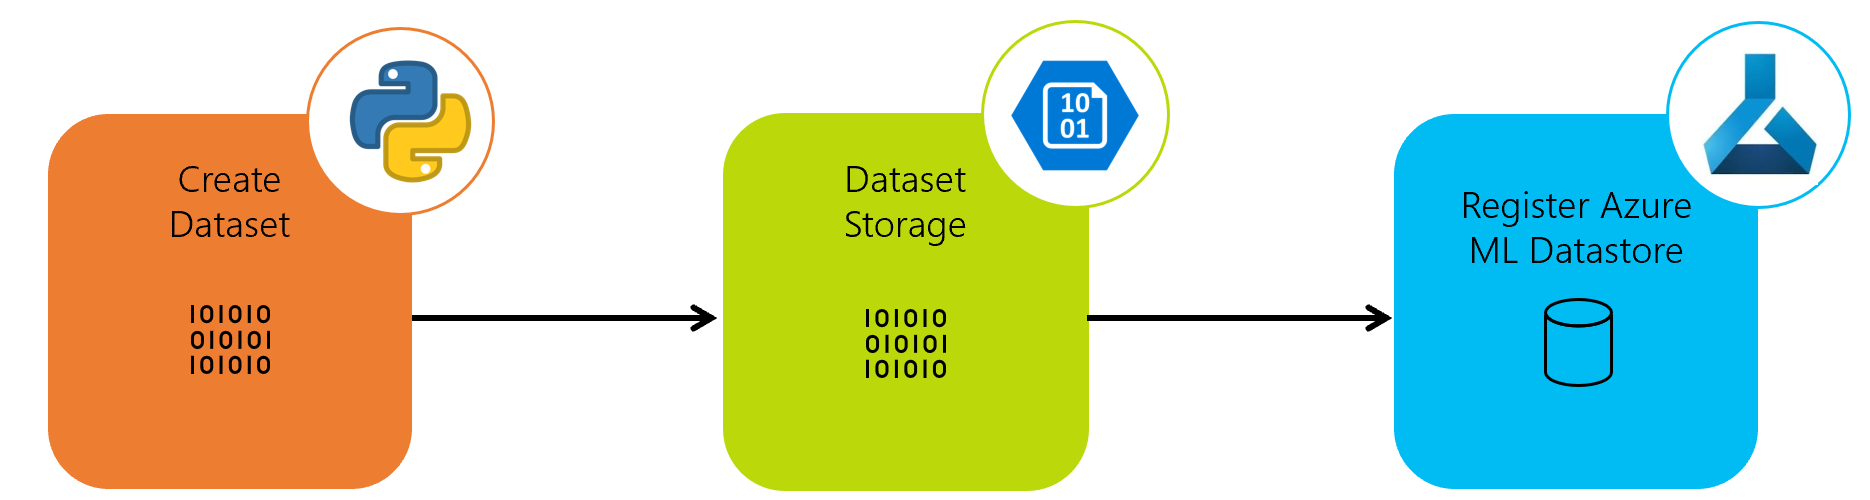
Create Data
Running the file src/my_custom_package/create_data.py will:
- Retrieve azure resource details and keys from the environment variables
- Create our training, test and validation data sets
- Upload these datasets to our Azure Storage Account
- Register the datasets
This is seen in our main function:
def main():
    # Retrieve vars from env
    storage_acct_name = os.environ['STORAGE_ACCT_NAME']
    storage_acct_key = os.environ['STORAGE_ACCT_KEY']
    tenant_id = os.environ['TENANT_ID']
    spn_id = os.environ['SPN_ID']
    spn_password = os.environ['SPN_PASSWORD']
    workspace_name = os.environ['AML_WORKSPACE_NAME']
    resource_group = os.environ['RESOURCE_GROUP']
    subscription_id = os.environ['SUBSCRIPTION_ID']

    # Instantiate Blob Storage Interface
    blob_storage_interface = BlobStorageInterface(
        storage_acct_name, storage_acct_key
    )

    # Create and Upload data to Blob Store
    data_creator = CreateClassificationData()
    data_creator.upload_data(blob_storage_interface)

    # Register Blob Store to AML
    aml_interface = AMLInterface(
        tenant_id, spn_id, spn_password, subscription_id,
        workspace_name, resource_group
    )
    aml_interface.register_datastore(
        TRAINING_CONTAINER, TRAINING_DATASTORE,
        storage_acct_name, storage_acct_key
    )
When the CreateClassificationData() class is instantiated it creates some dummy classification data for us to use to create a classification machine learning model:
class CreateClassificationData():
    def __init__(self):
        x_arr, y_arr = make_classification(
            n_samples=5000,
            n_features=10,
            n_classes=2,
            random_state=1
        )
        col_names = ['A', 'B', 'C', 'D', 'E',
                     'F', 'G', 'H', 'I', 'J']
        x_df = pd.DataFrame(x_arr, columns=col_names)
        y_df = pd.DataFrame({'Target': y_arr})
        # Training set n=3500
        self.x_train = x_df.iloc[:3500]
        self.y_train = y_df.iloc[:3500]

        # Testing set n=750
        self.x_test = x_df.iloc[3500:4250]
        self.y_test = y_df.iloc[3500:4250]

        # Validation set n=750
        self.x_valid = x_df.iloc[4250:]
        self.y_valid = y_df.iloc[4250:]
We create 3 sets of data – a training set, a test set and a validation set of data. When we call the upload_data method of our CreateClassificationData class, this uploads these three sets of data to the blob store:
def upload_data(self, blob_storage_interface):
    self.upload_training_data(blob_storage_interface)
    self.upload_evaluation_data(blob_storage_interface)
    self.upload_validation_data(blob_storage_interface)
Set Up Pipeline on Azure DevOps
First you’ll need to have set up the resources as described in part 1.
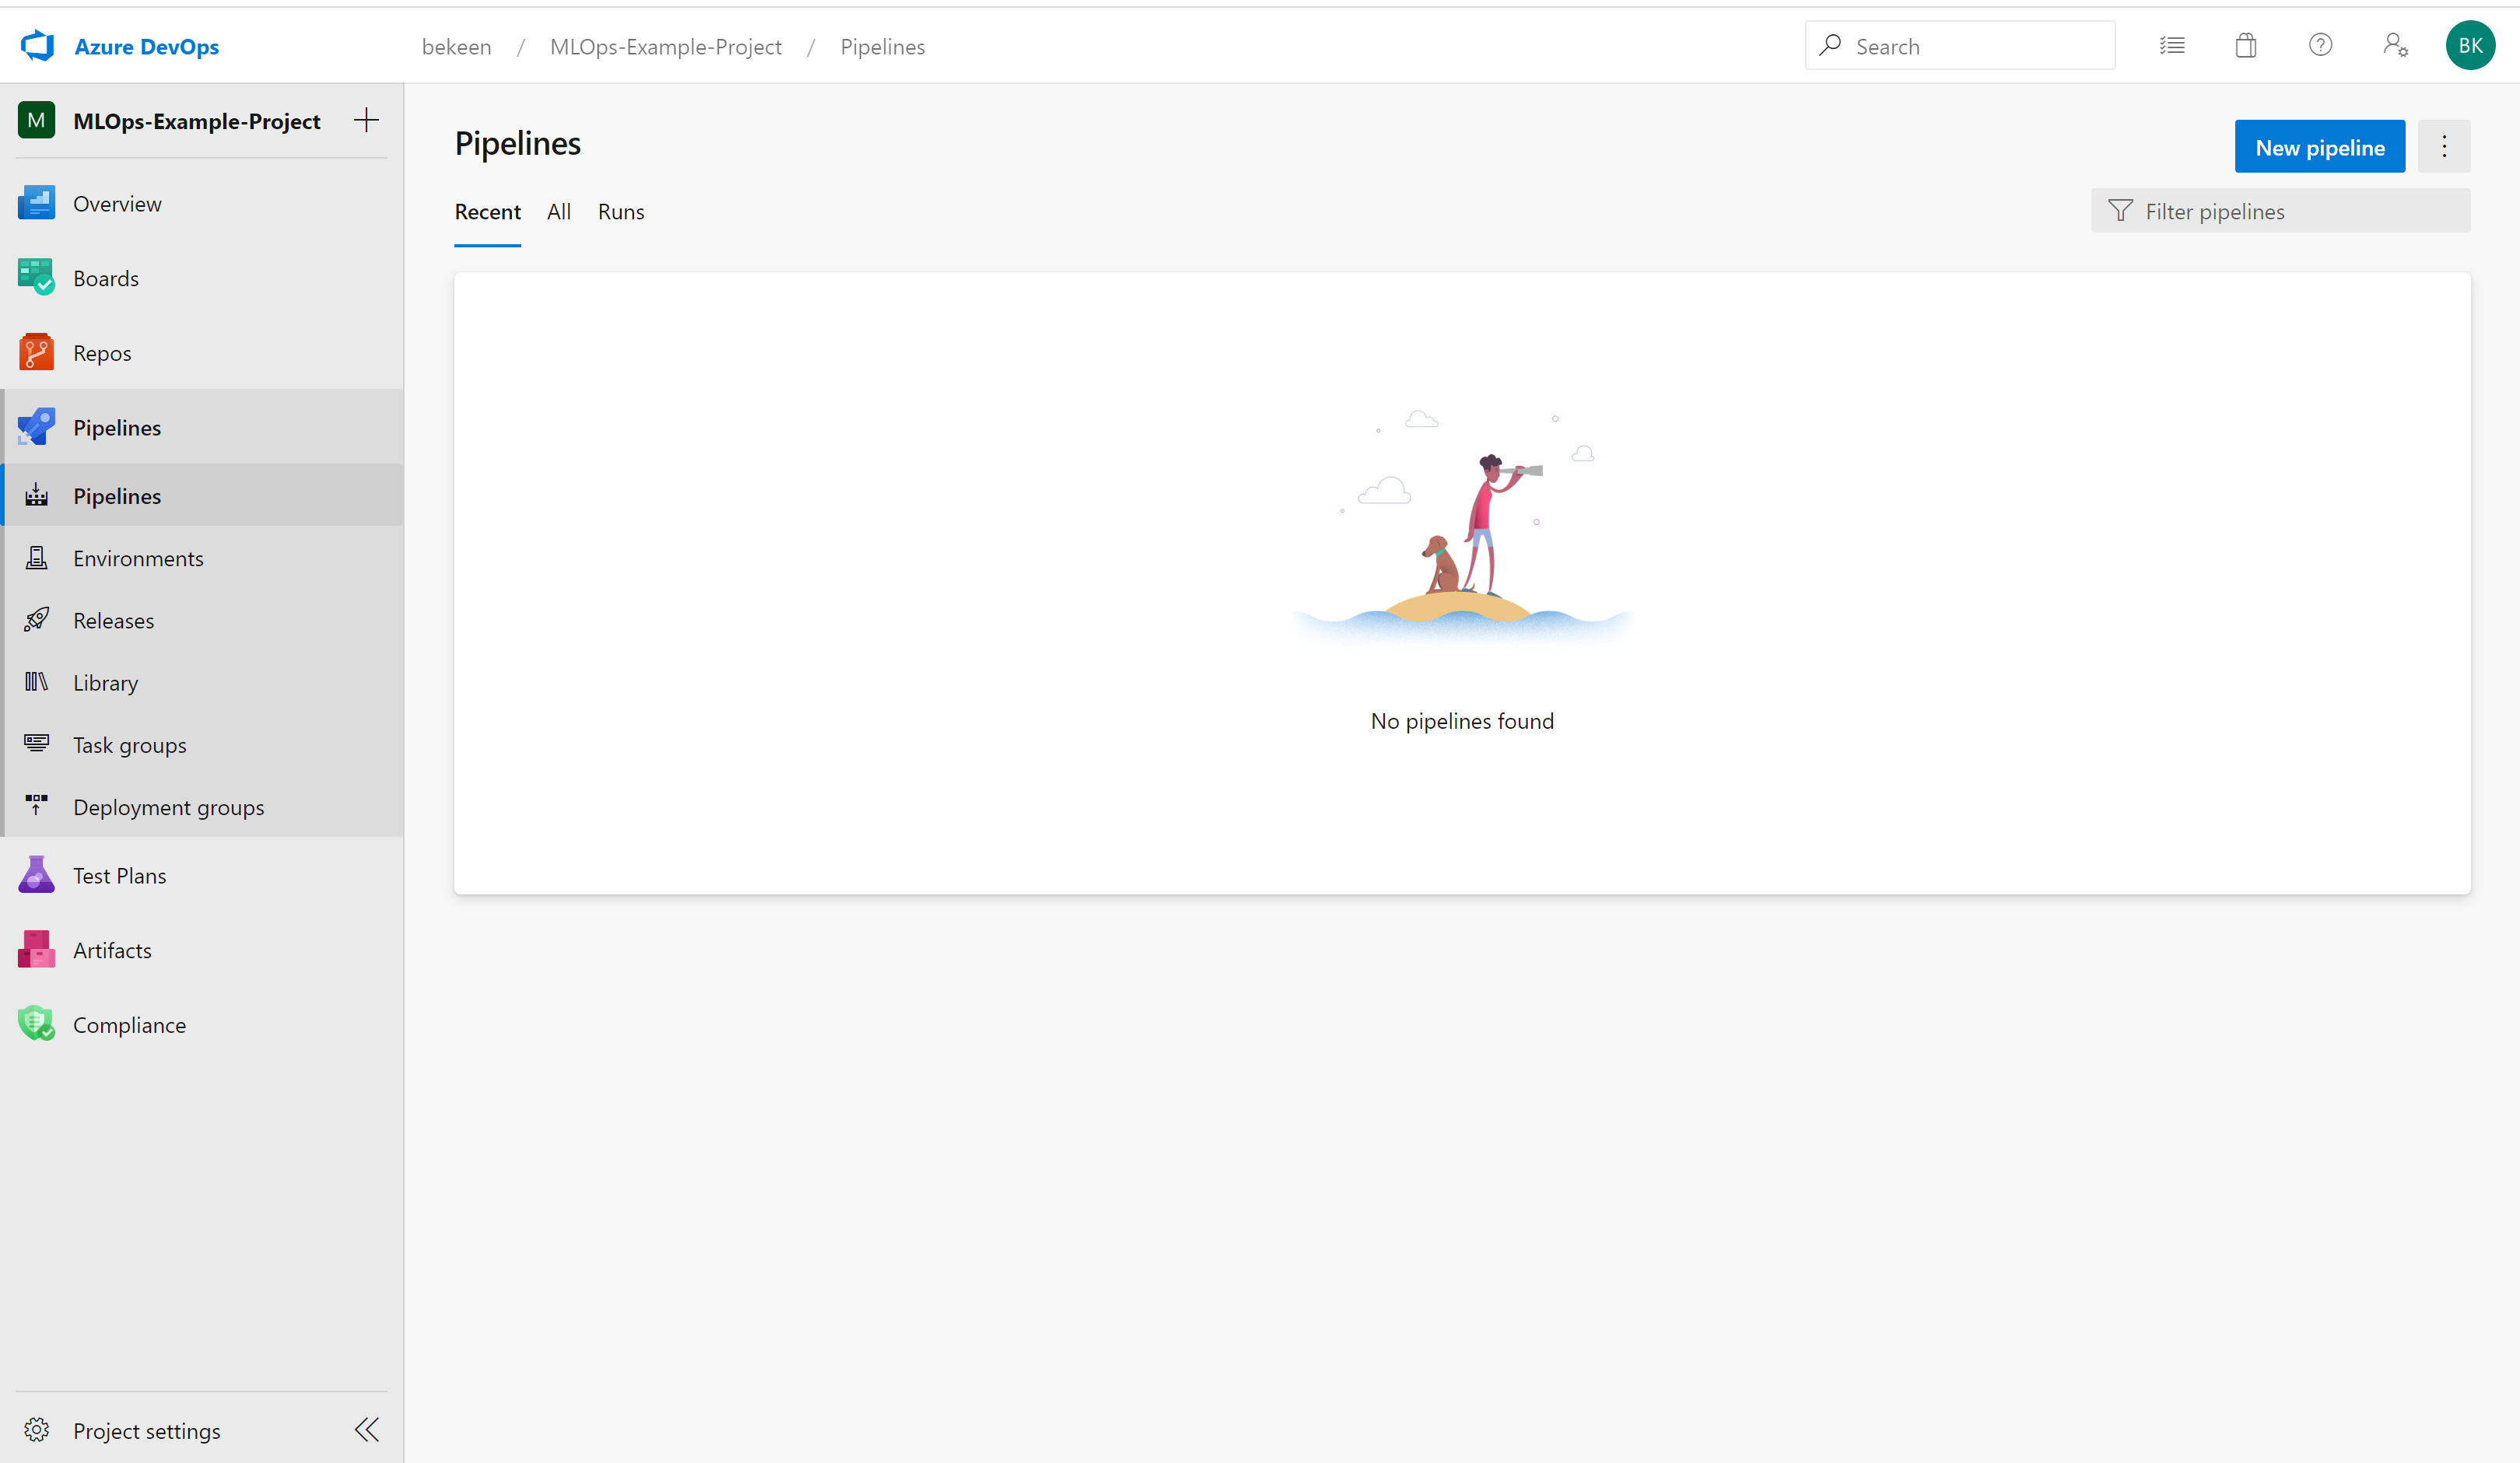
Now to set up the pipeline, first navigate to Pipelines:
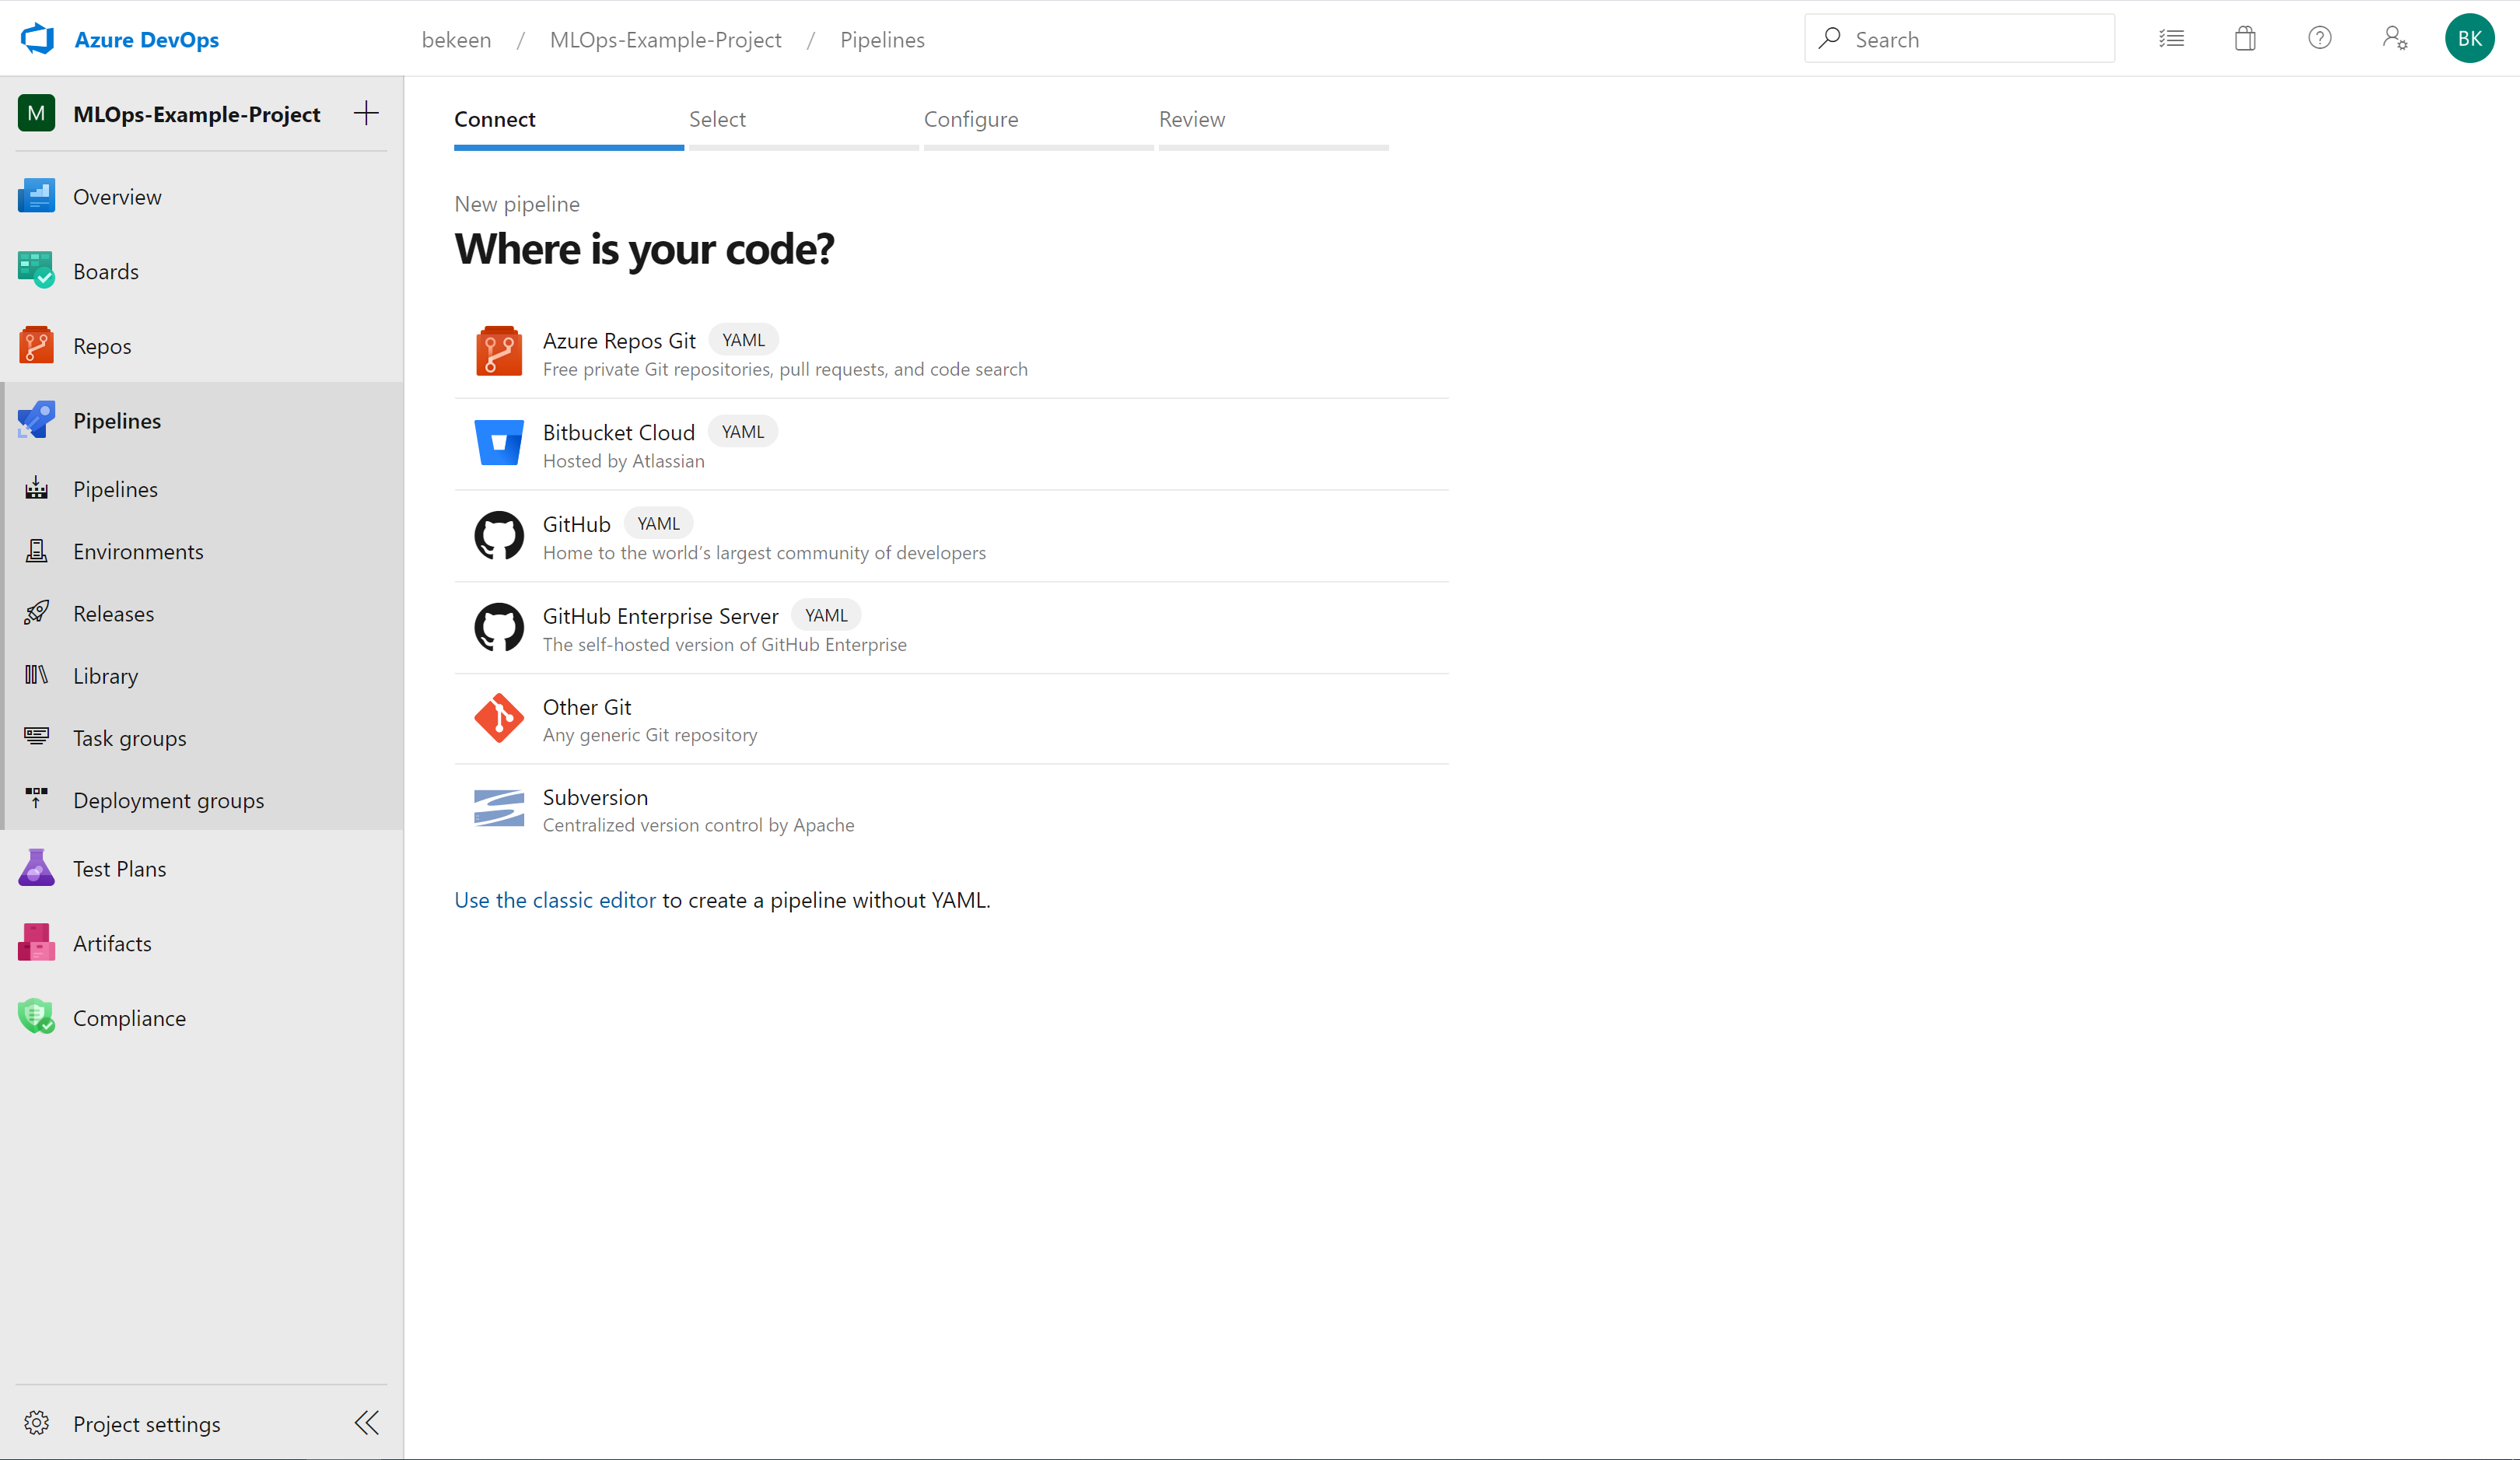
Then click on “New Pipeline”, you’ll be greeted with the screen below. Assuming you’re using Azure Repos git repositories, select the top option:
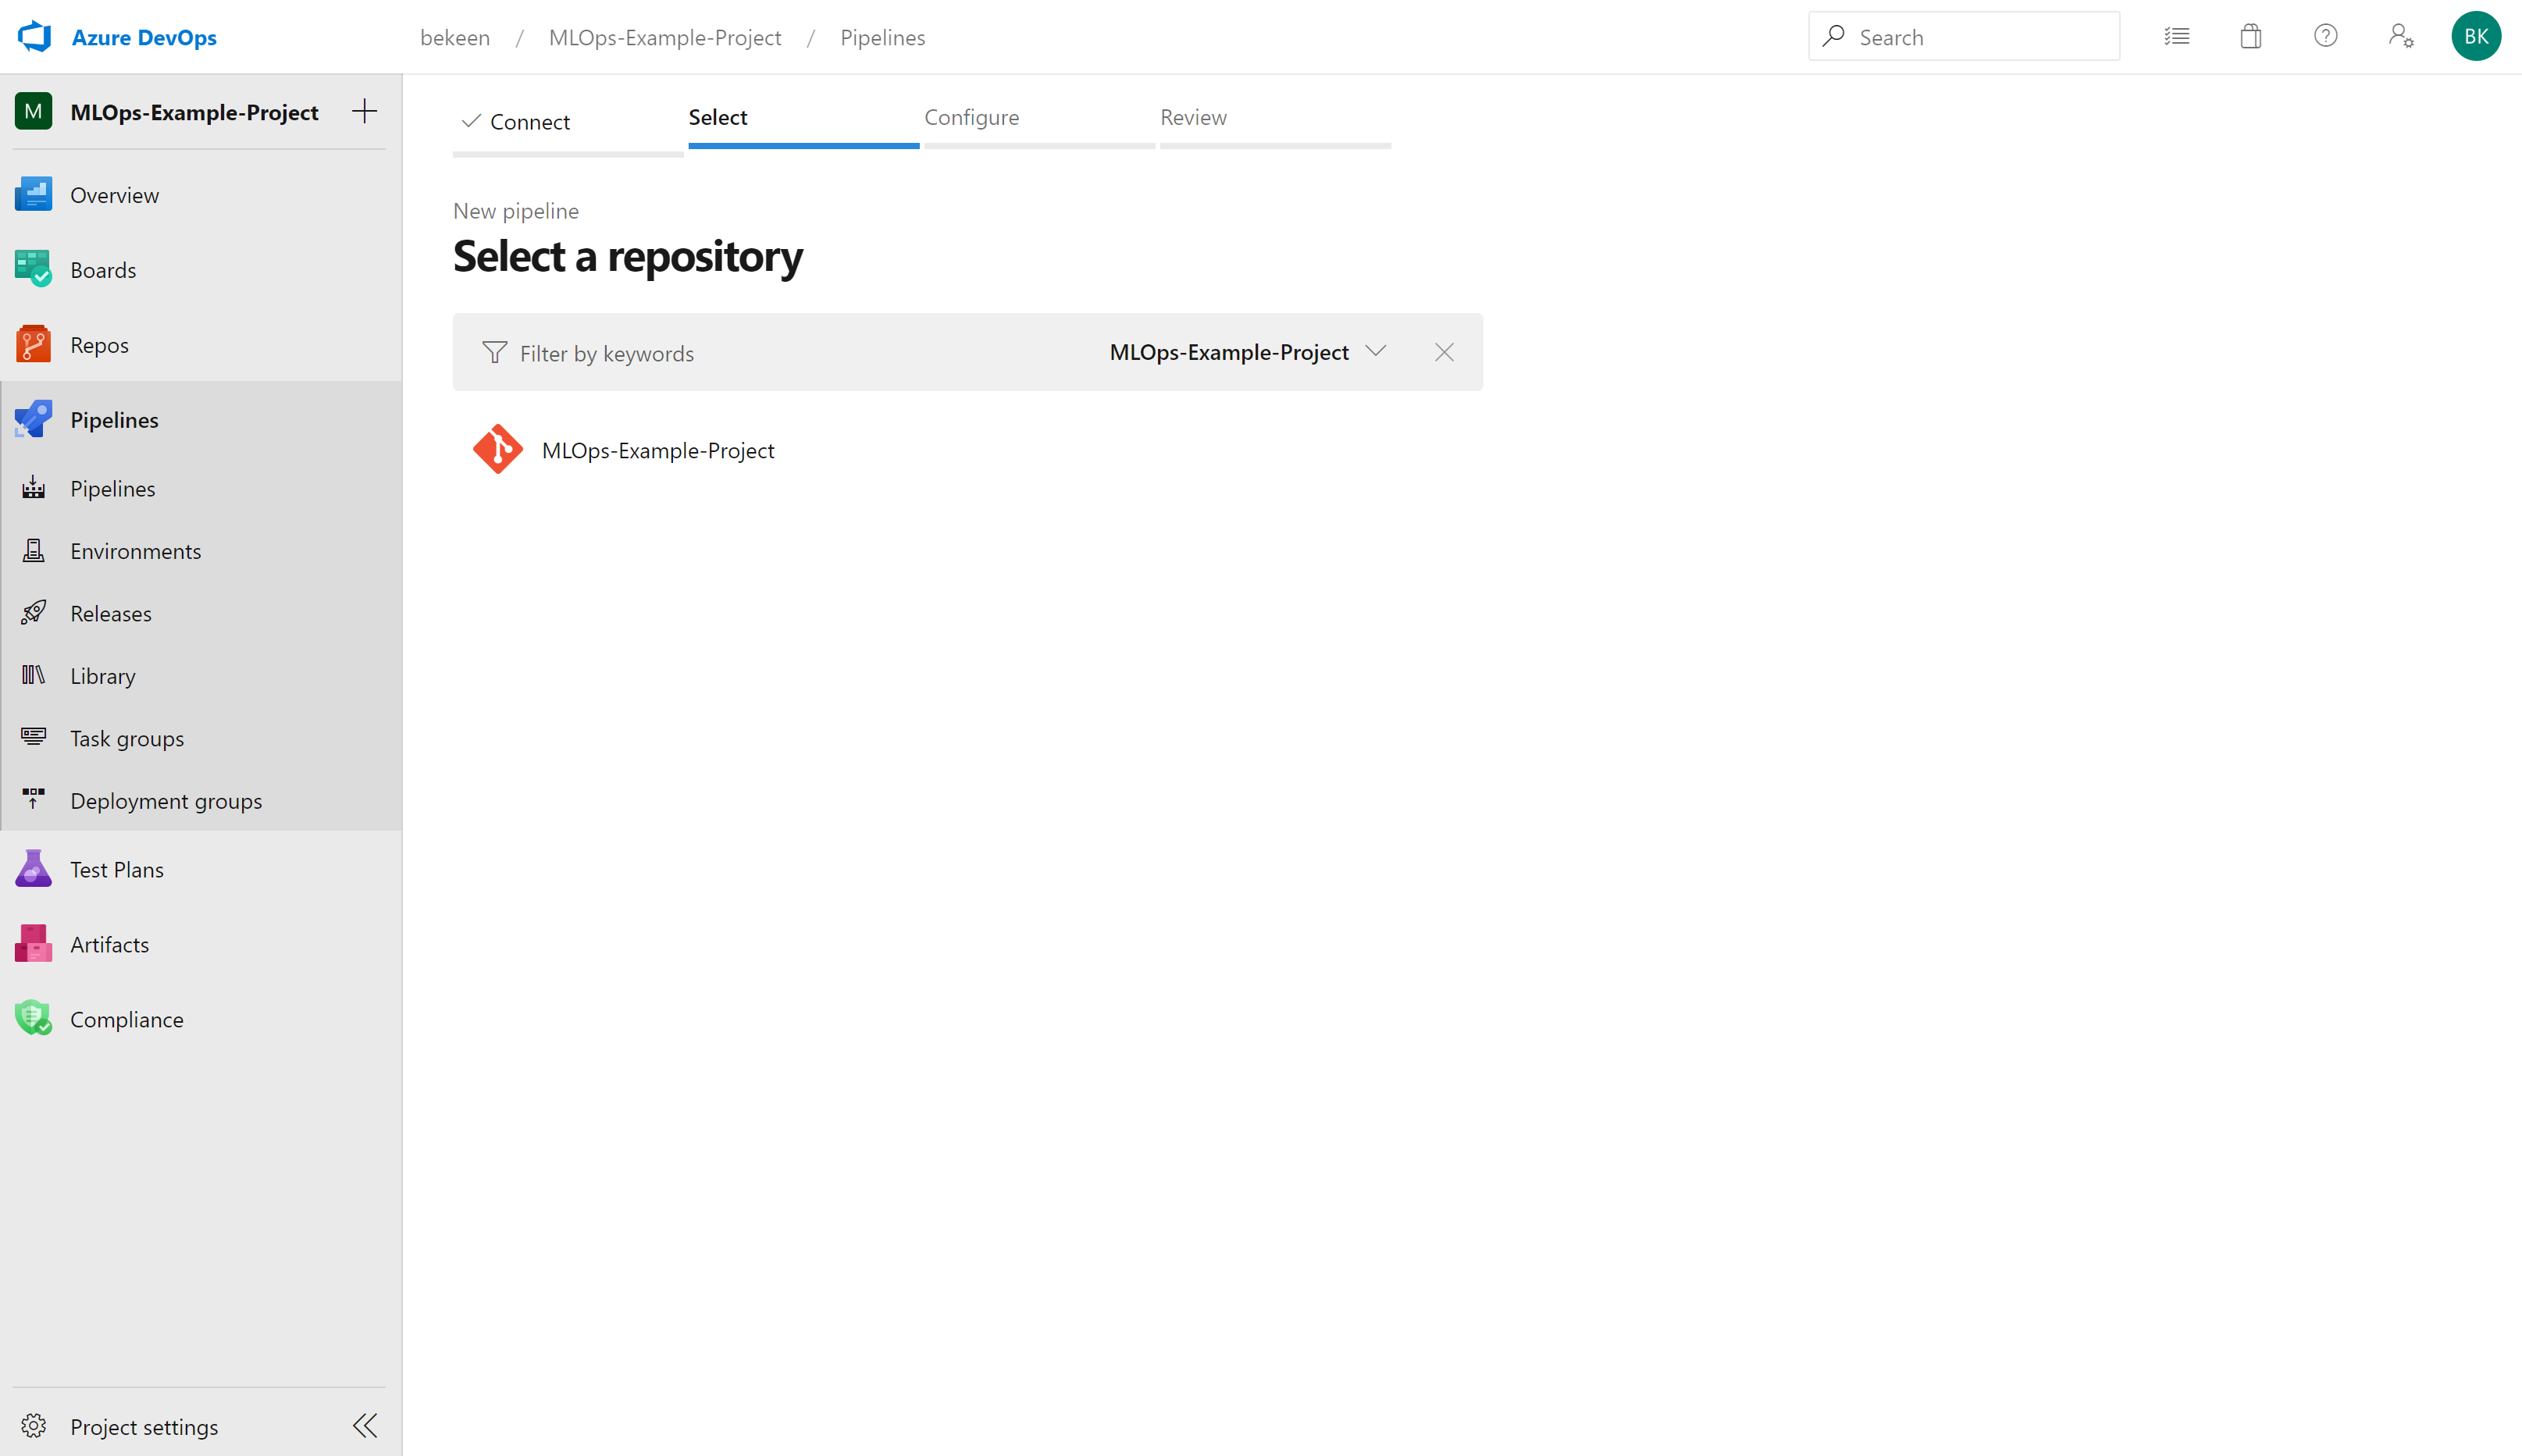
Once you’ve selected your code source, you’ll select which repository you’re using:
Then you need to configure your pipeline. We’ll be using a yaml file so select the bottom option below (“Existing Azure Pipelines YAML File”):
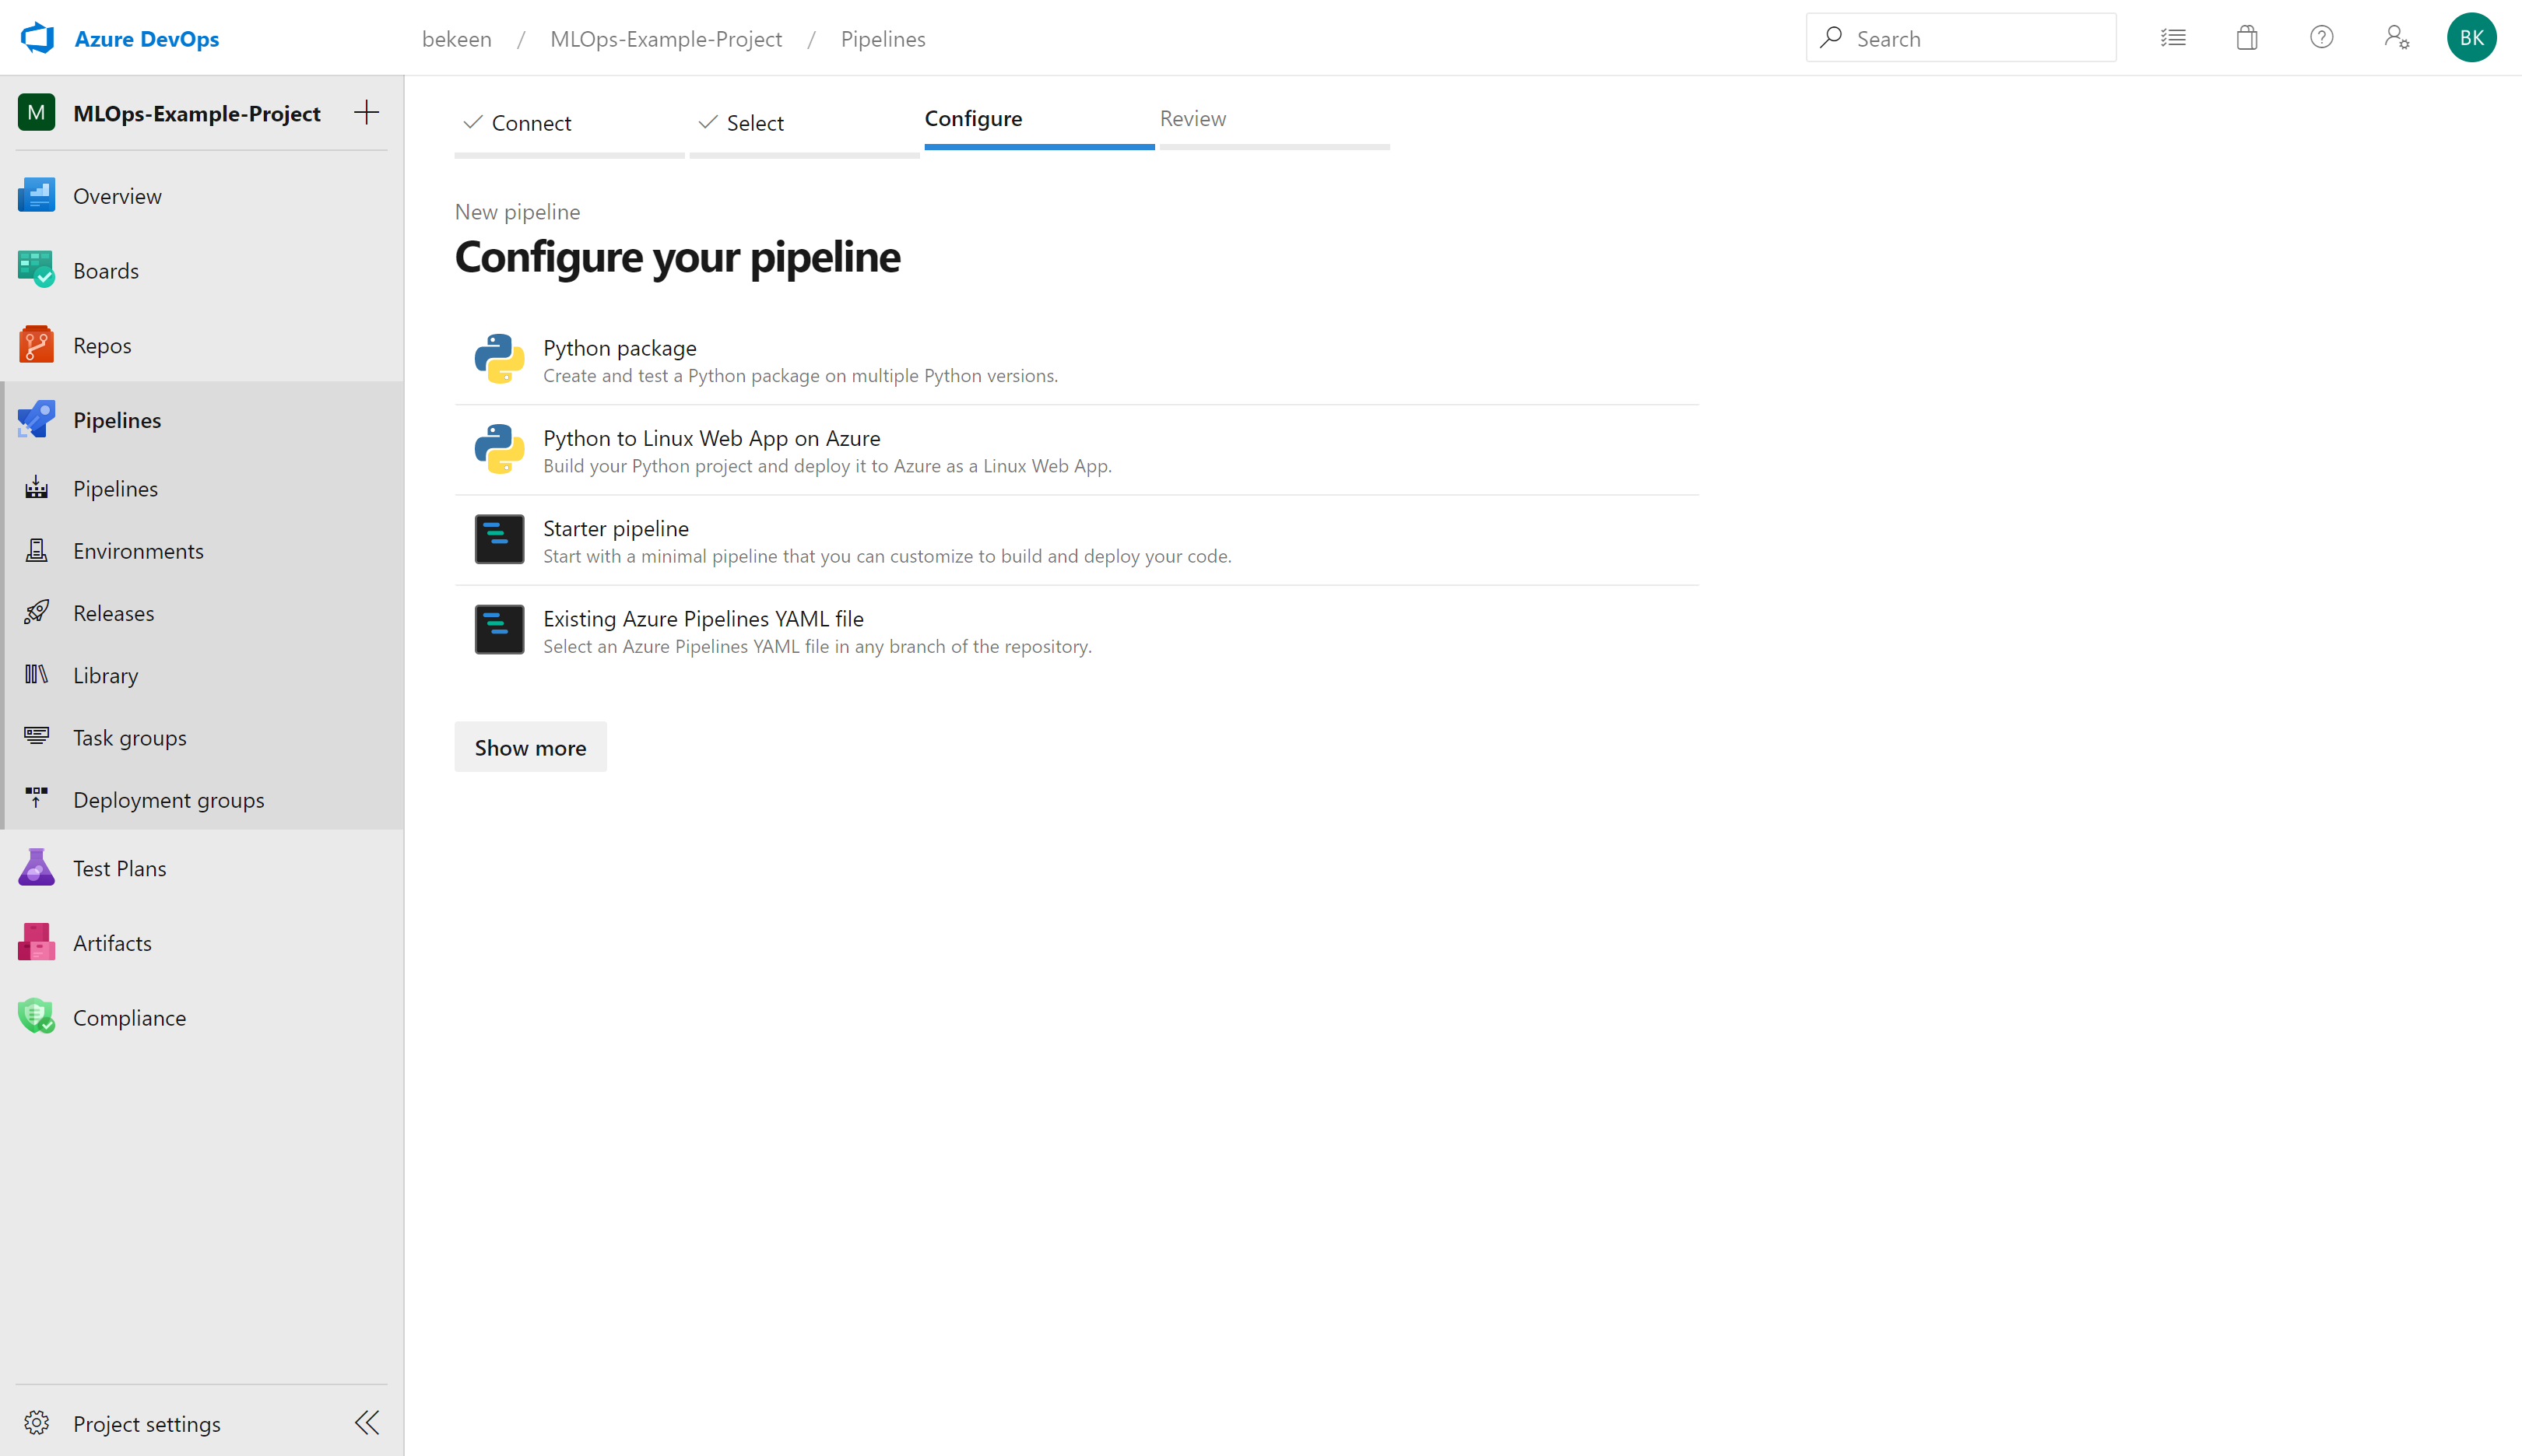
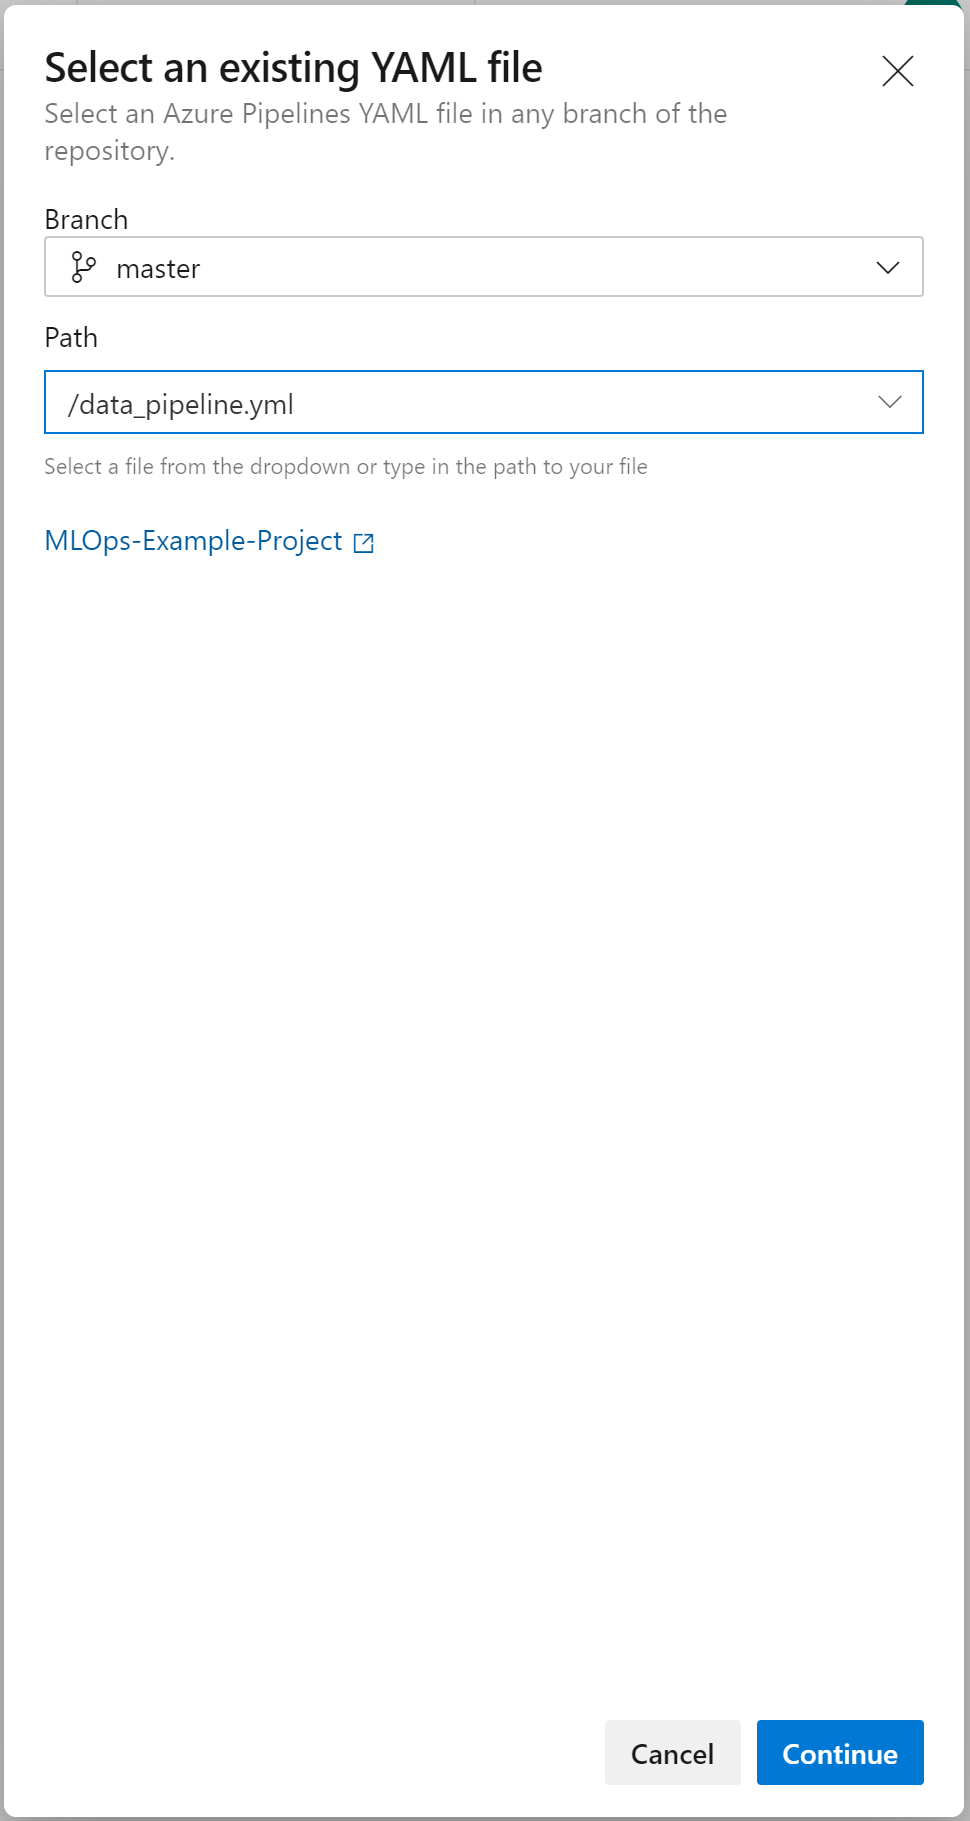
When you click on this, you have the option to select a yaml file. In this case we’ll be using data-pipeline.yml, so select this yaml file:
You’ll then be taken to a page in which you can review this yaml file. Once you’ve confirmed it’s all okay, click on “Run”:

You may need to grant your pipeline access to your subscription to access the variables it will need to access.
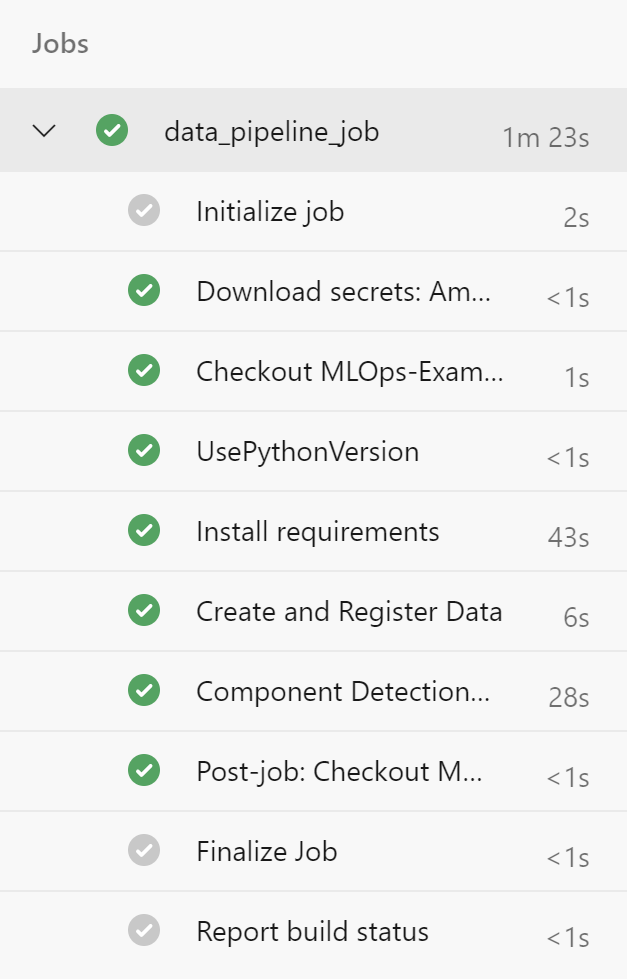
The pipeline will then run and, if successful, you should see an output similar to the below:
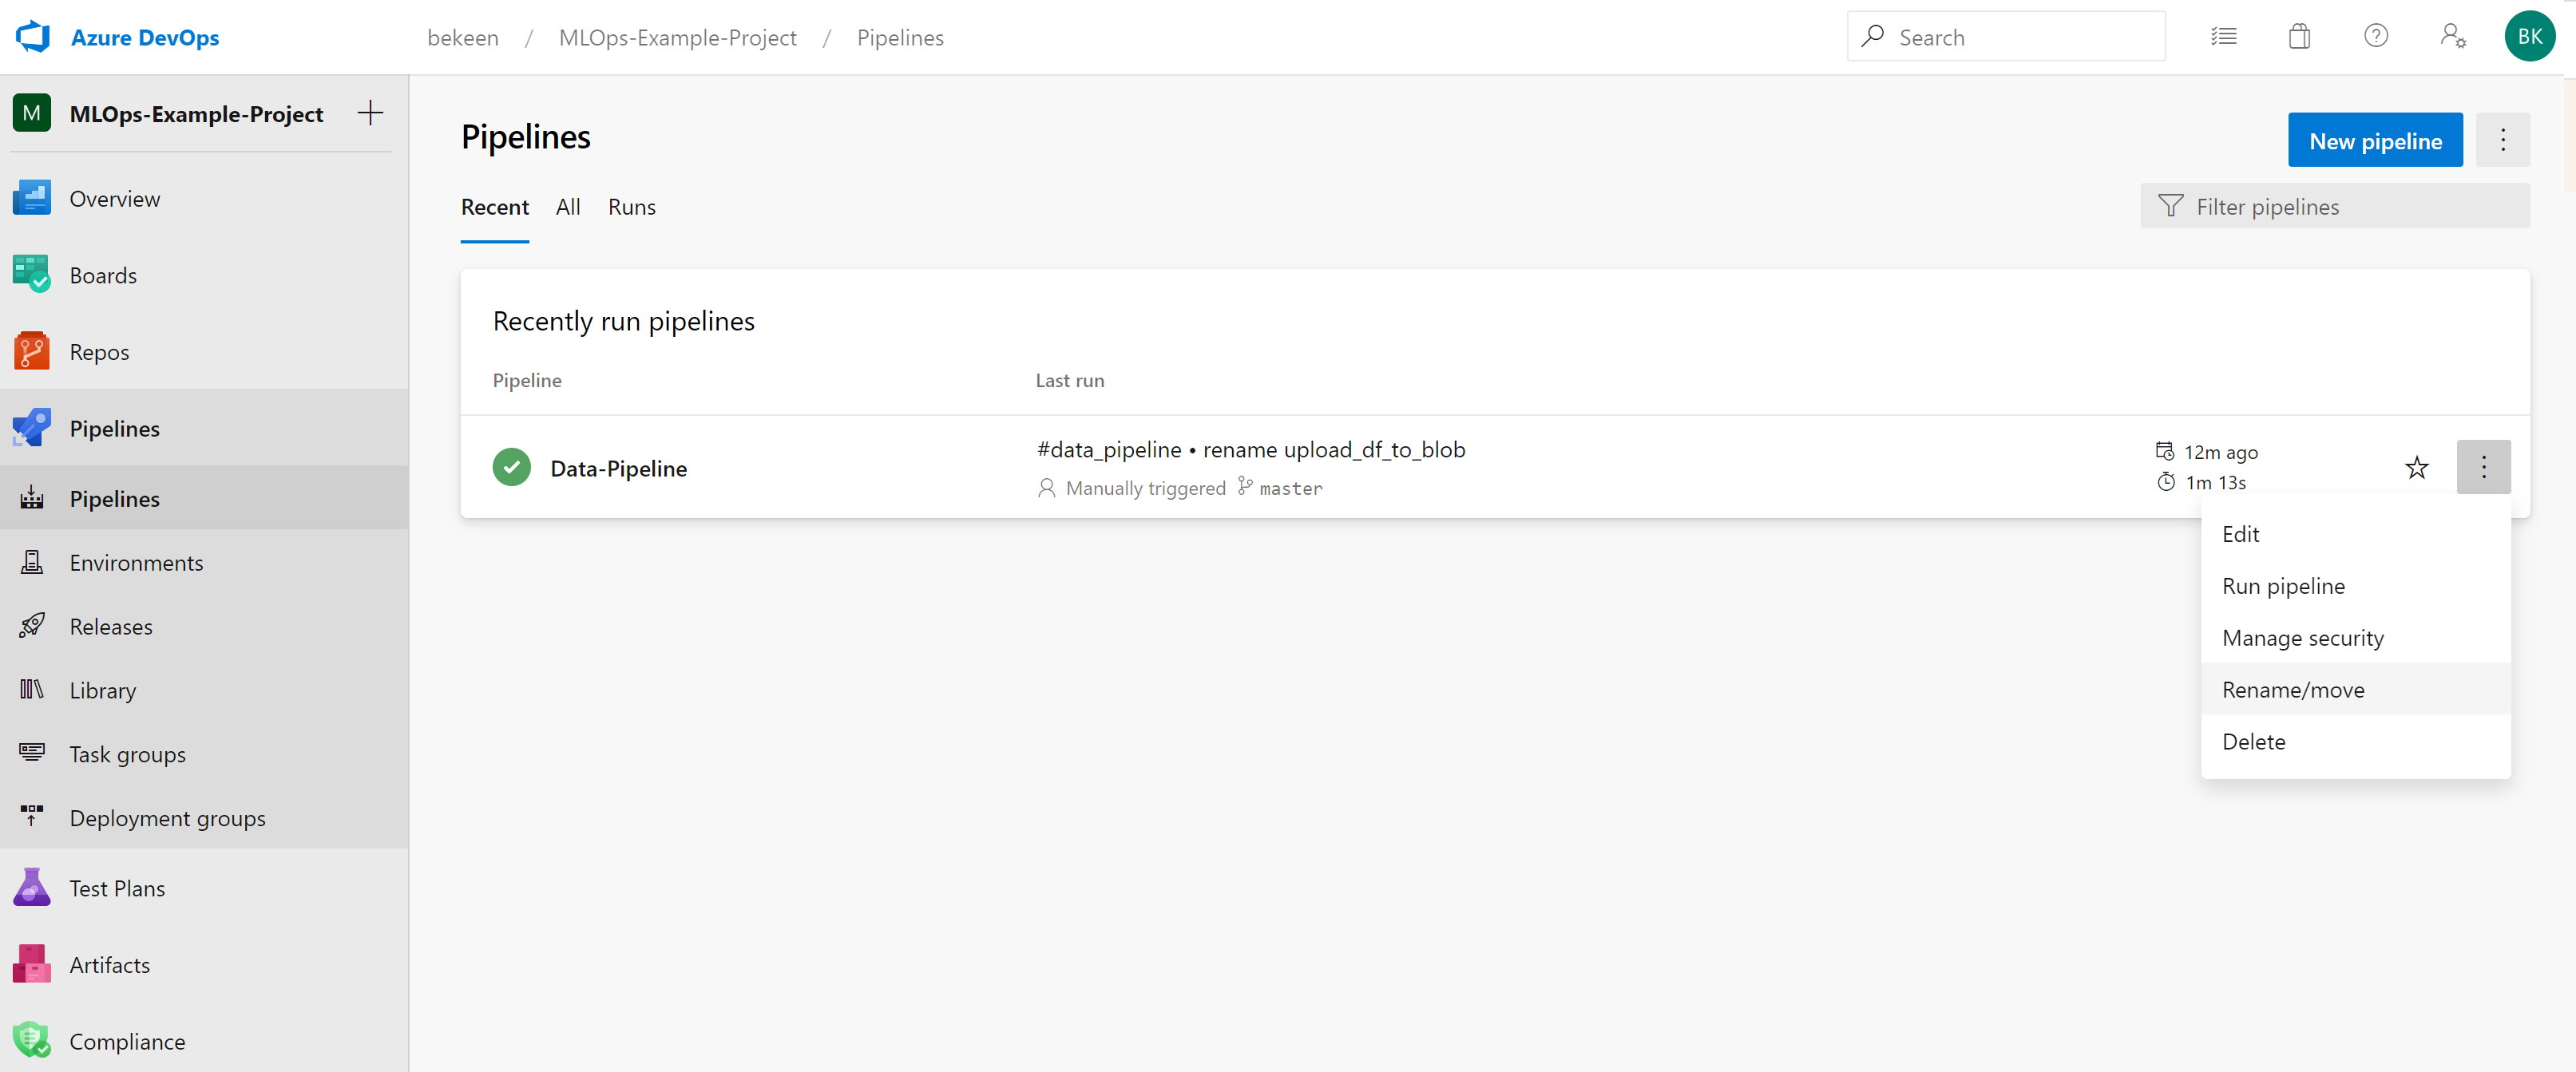
Rename Pipeline
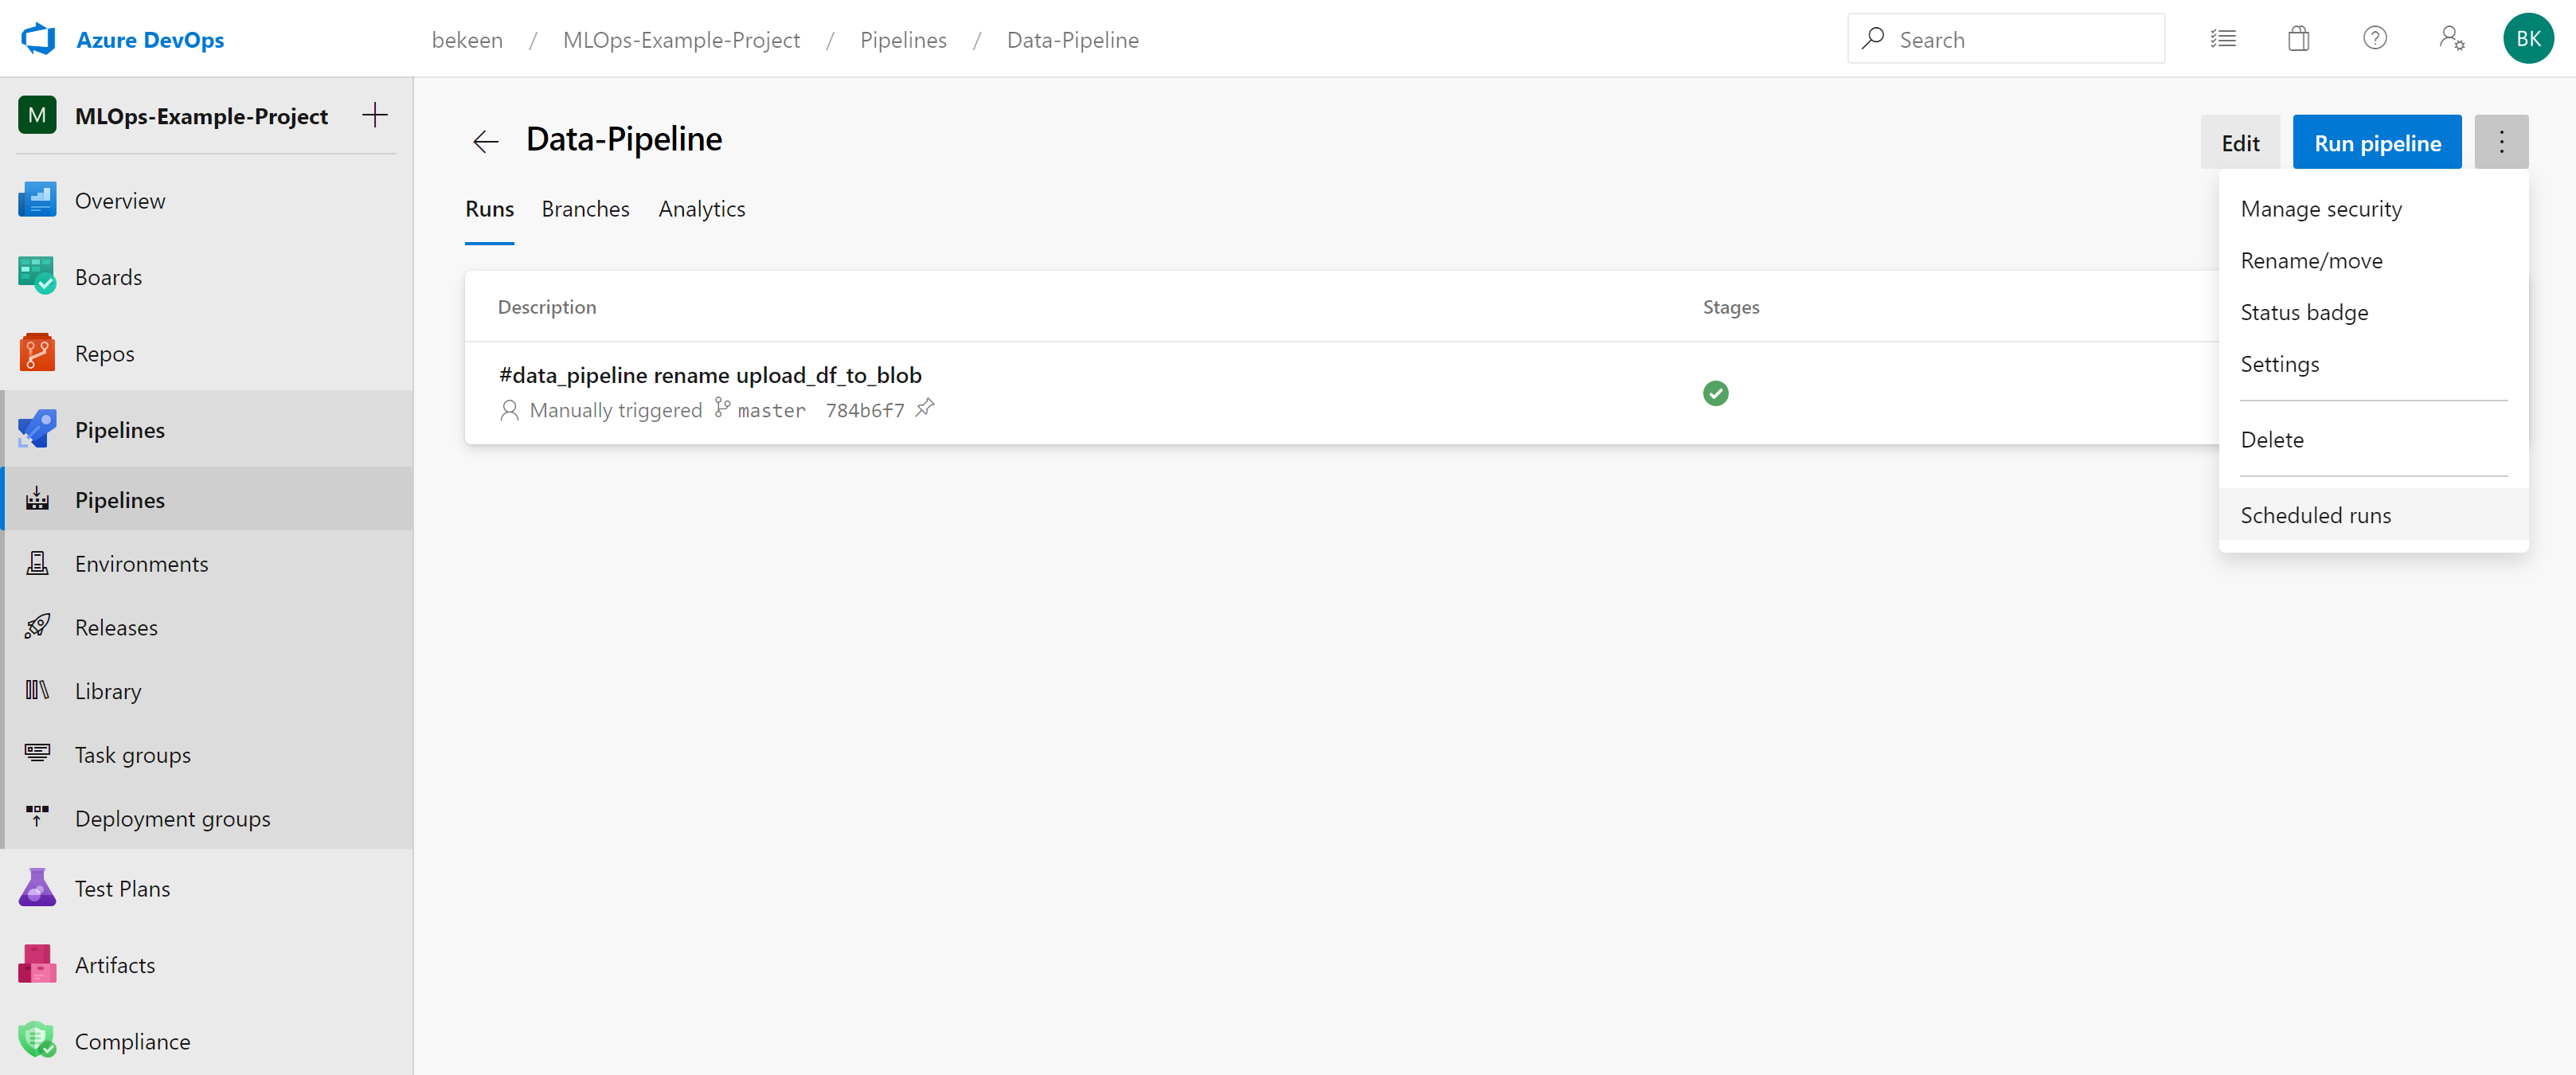
As we’ll want to name our pipeline to something more descriptive such as “Data-Pipeline”, on the Azure pipelines page, click on the ellipsis and rename the pipeline:
See Scheduled Runs
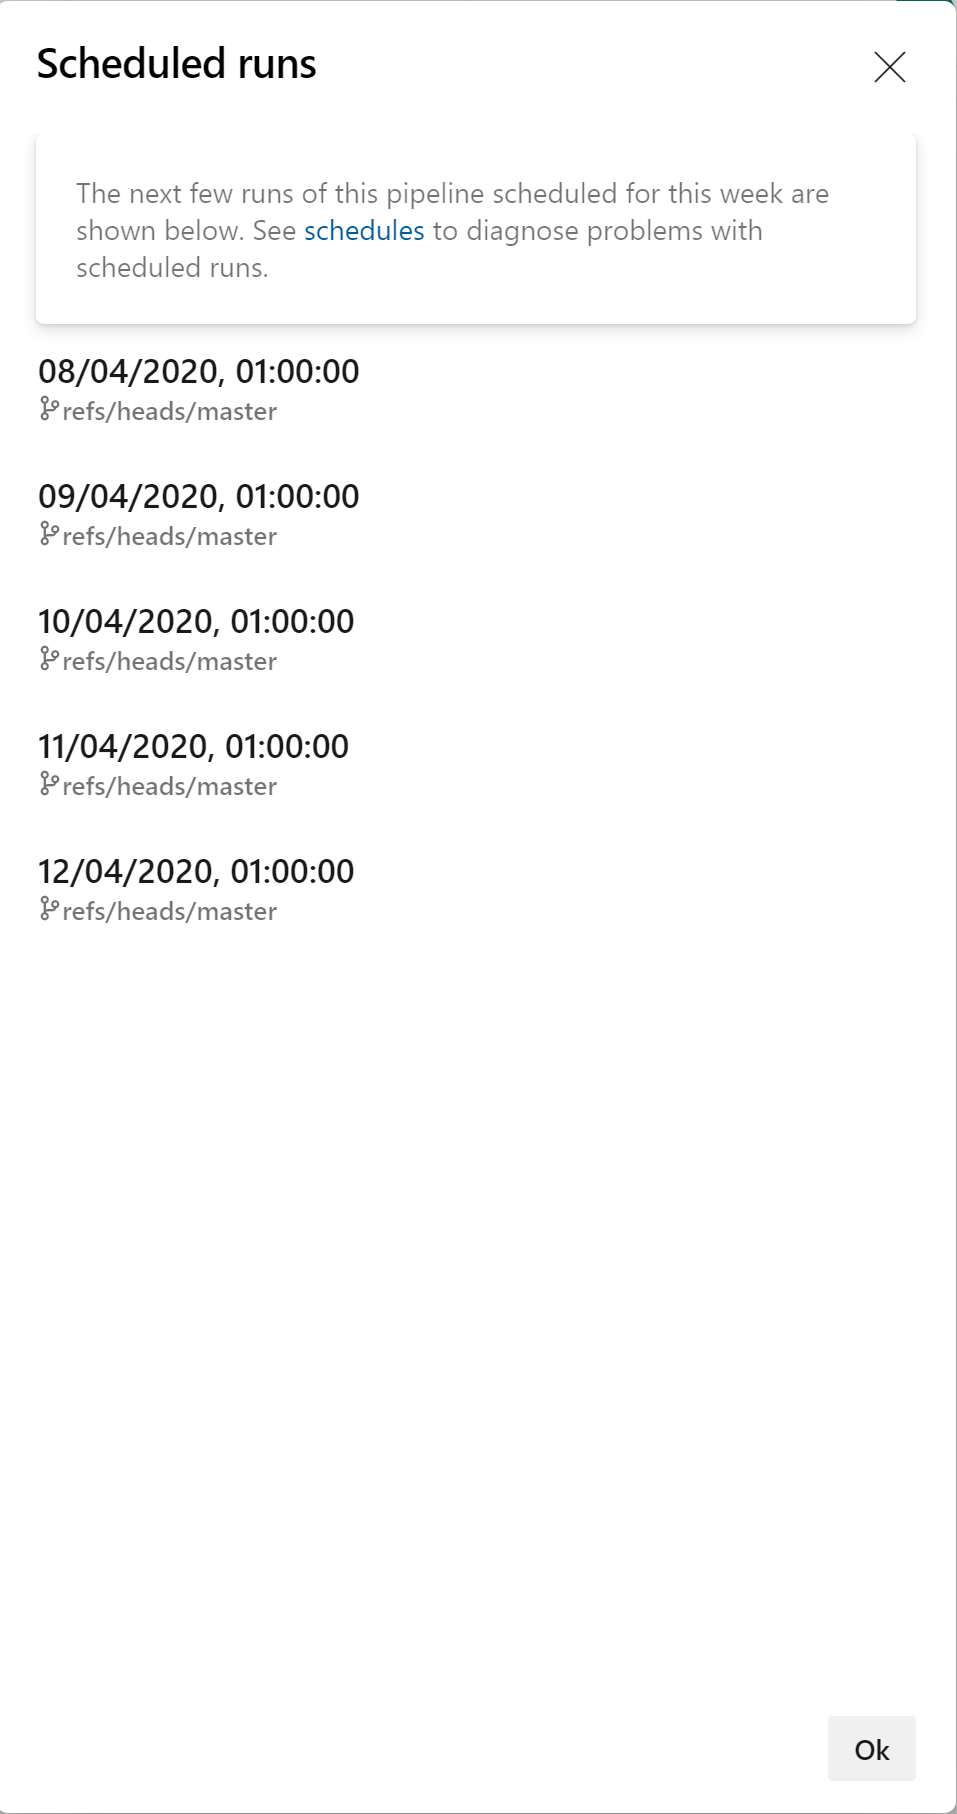
To see the runs that are scheduled for the week, click on the pipeline, you’ll then be taken to a page as shown below. Click on the ellipsis in the top-right and click “Scheduled runs”.
You should then see the runs that are scheduled for the upcoming week:
Now that our data pipeline is set up, we can move on to our next pipeline, an environment pipeline.