Send WhatsApp messages using Python
WhatsApp has now opened up its API so you no longer have to go through a partner to send and receive WhatsApp messages!
In this blog post we’ll look at how to get started sending WhatsApp messages using Python and we’ll be using an example in which we send a WhatsApp message when a CI/CD build pipeline fails.
Set Up Meta App
First you’ll need to follow the instructions on this page to:
- Register as a Meta Developer
- Enable two-factor authentication for your account
- Create a Meta App – you need to create a Business App for WhatsApp
Once you’ve done that, go to your app and set up the WhatsApp product:

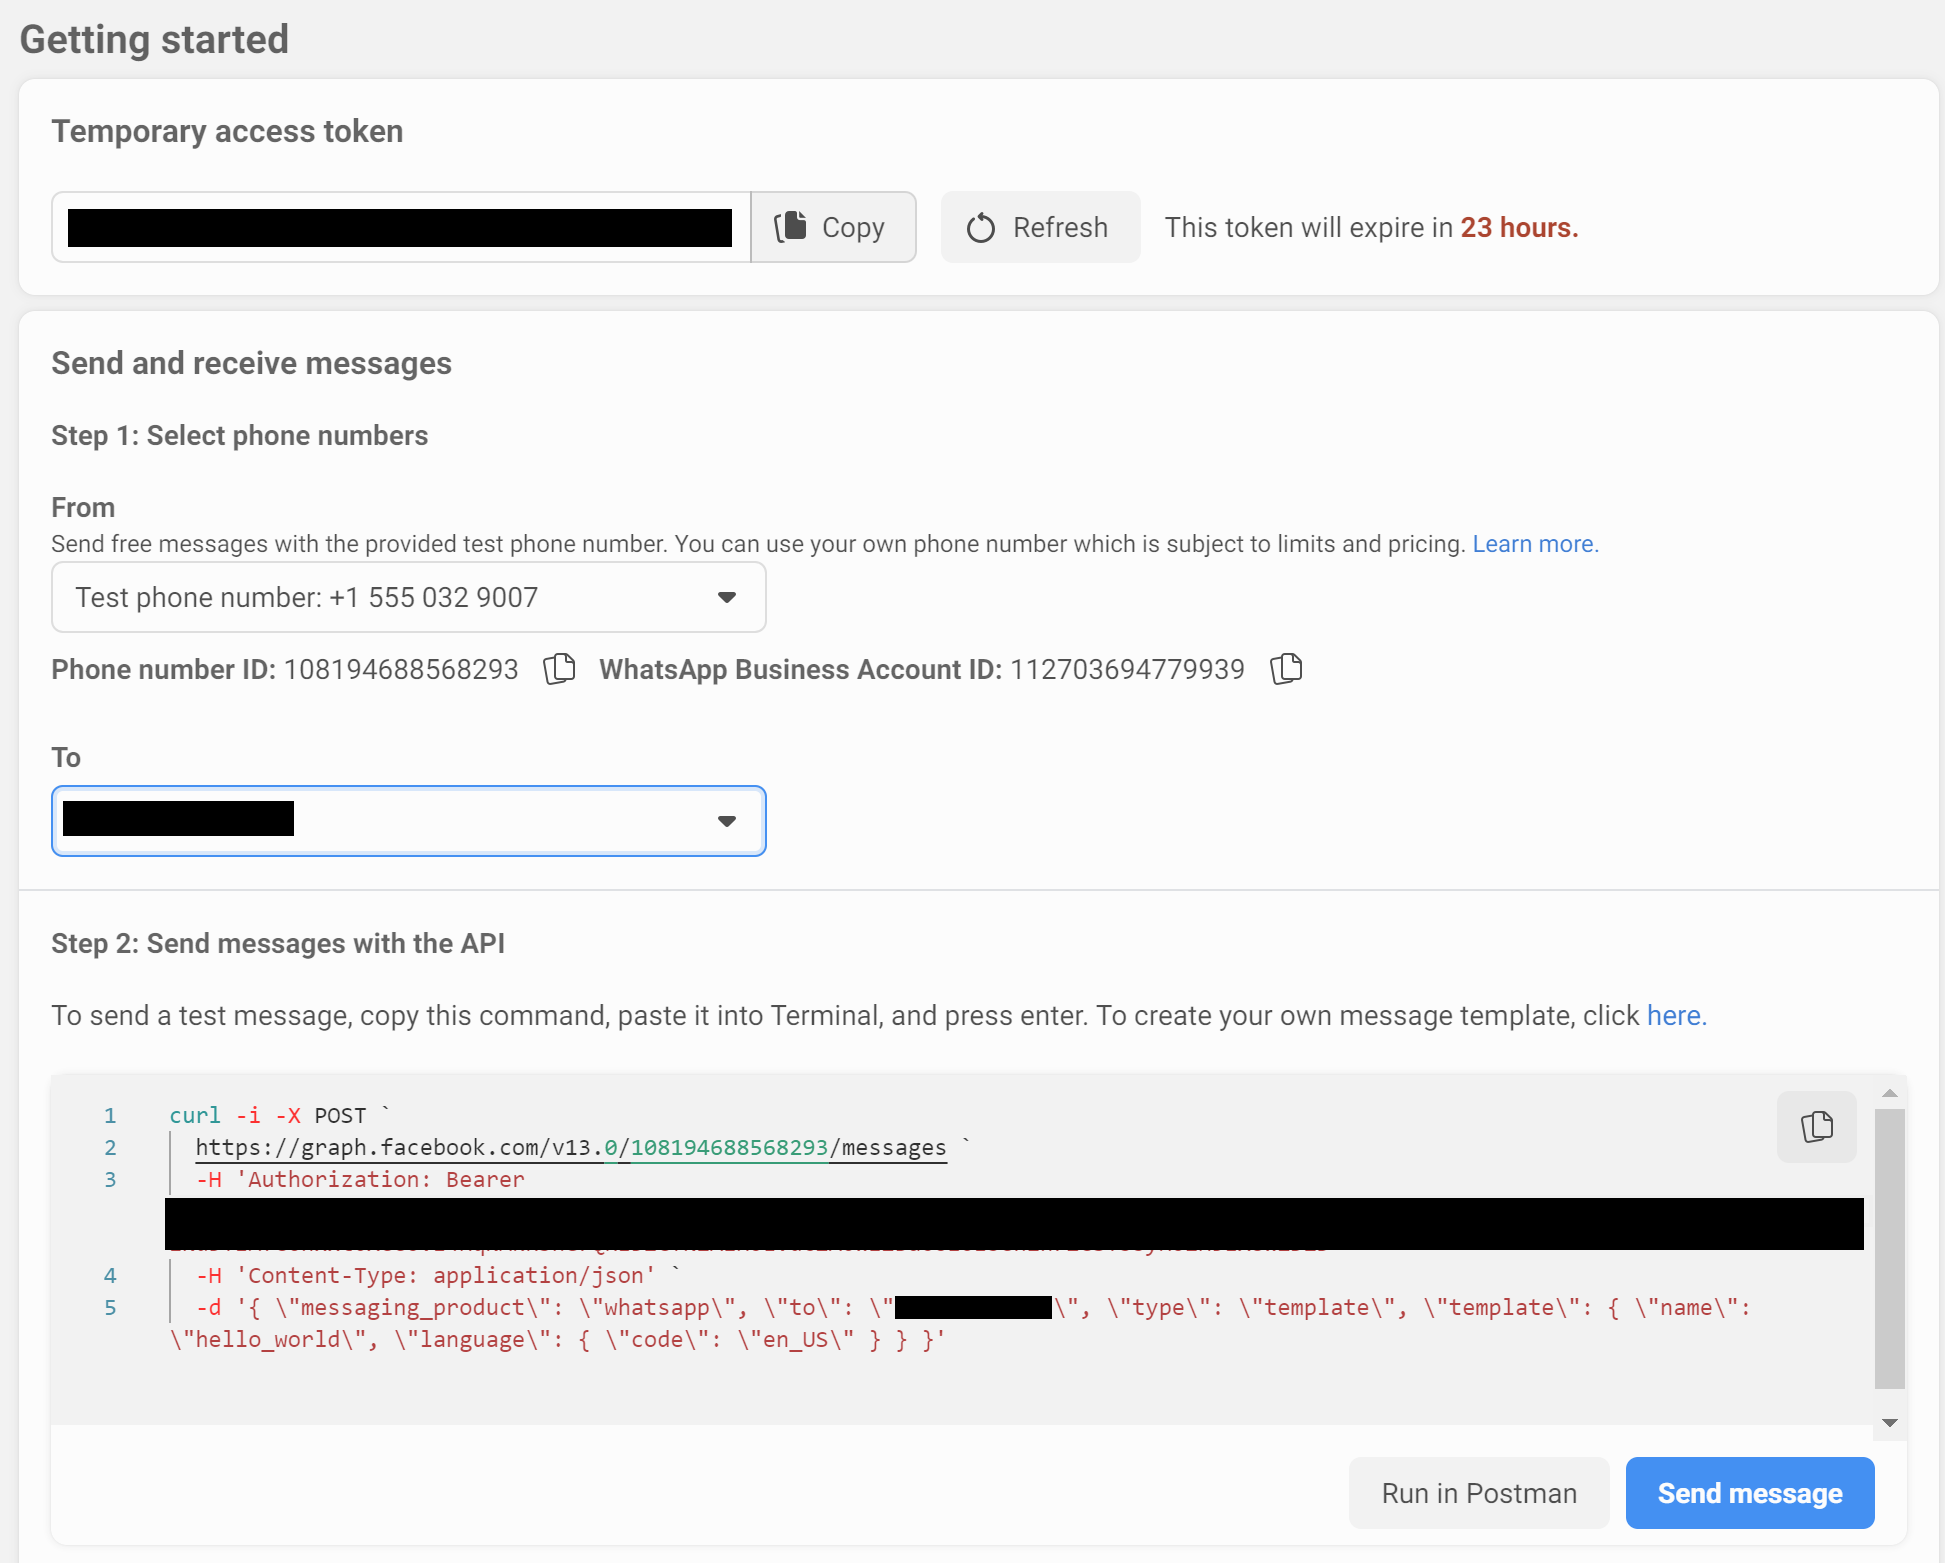
You’ll be given a temporary access token and a Phone Number ID, note these down as you’ll need them later. Set up your own phone number as a recipient and you can have a go at sending yourself a test message:
Set Up Message Template
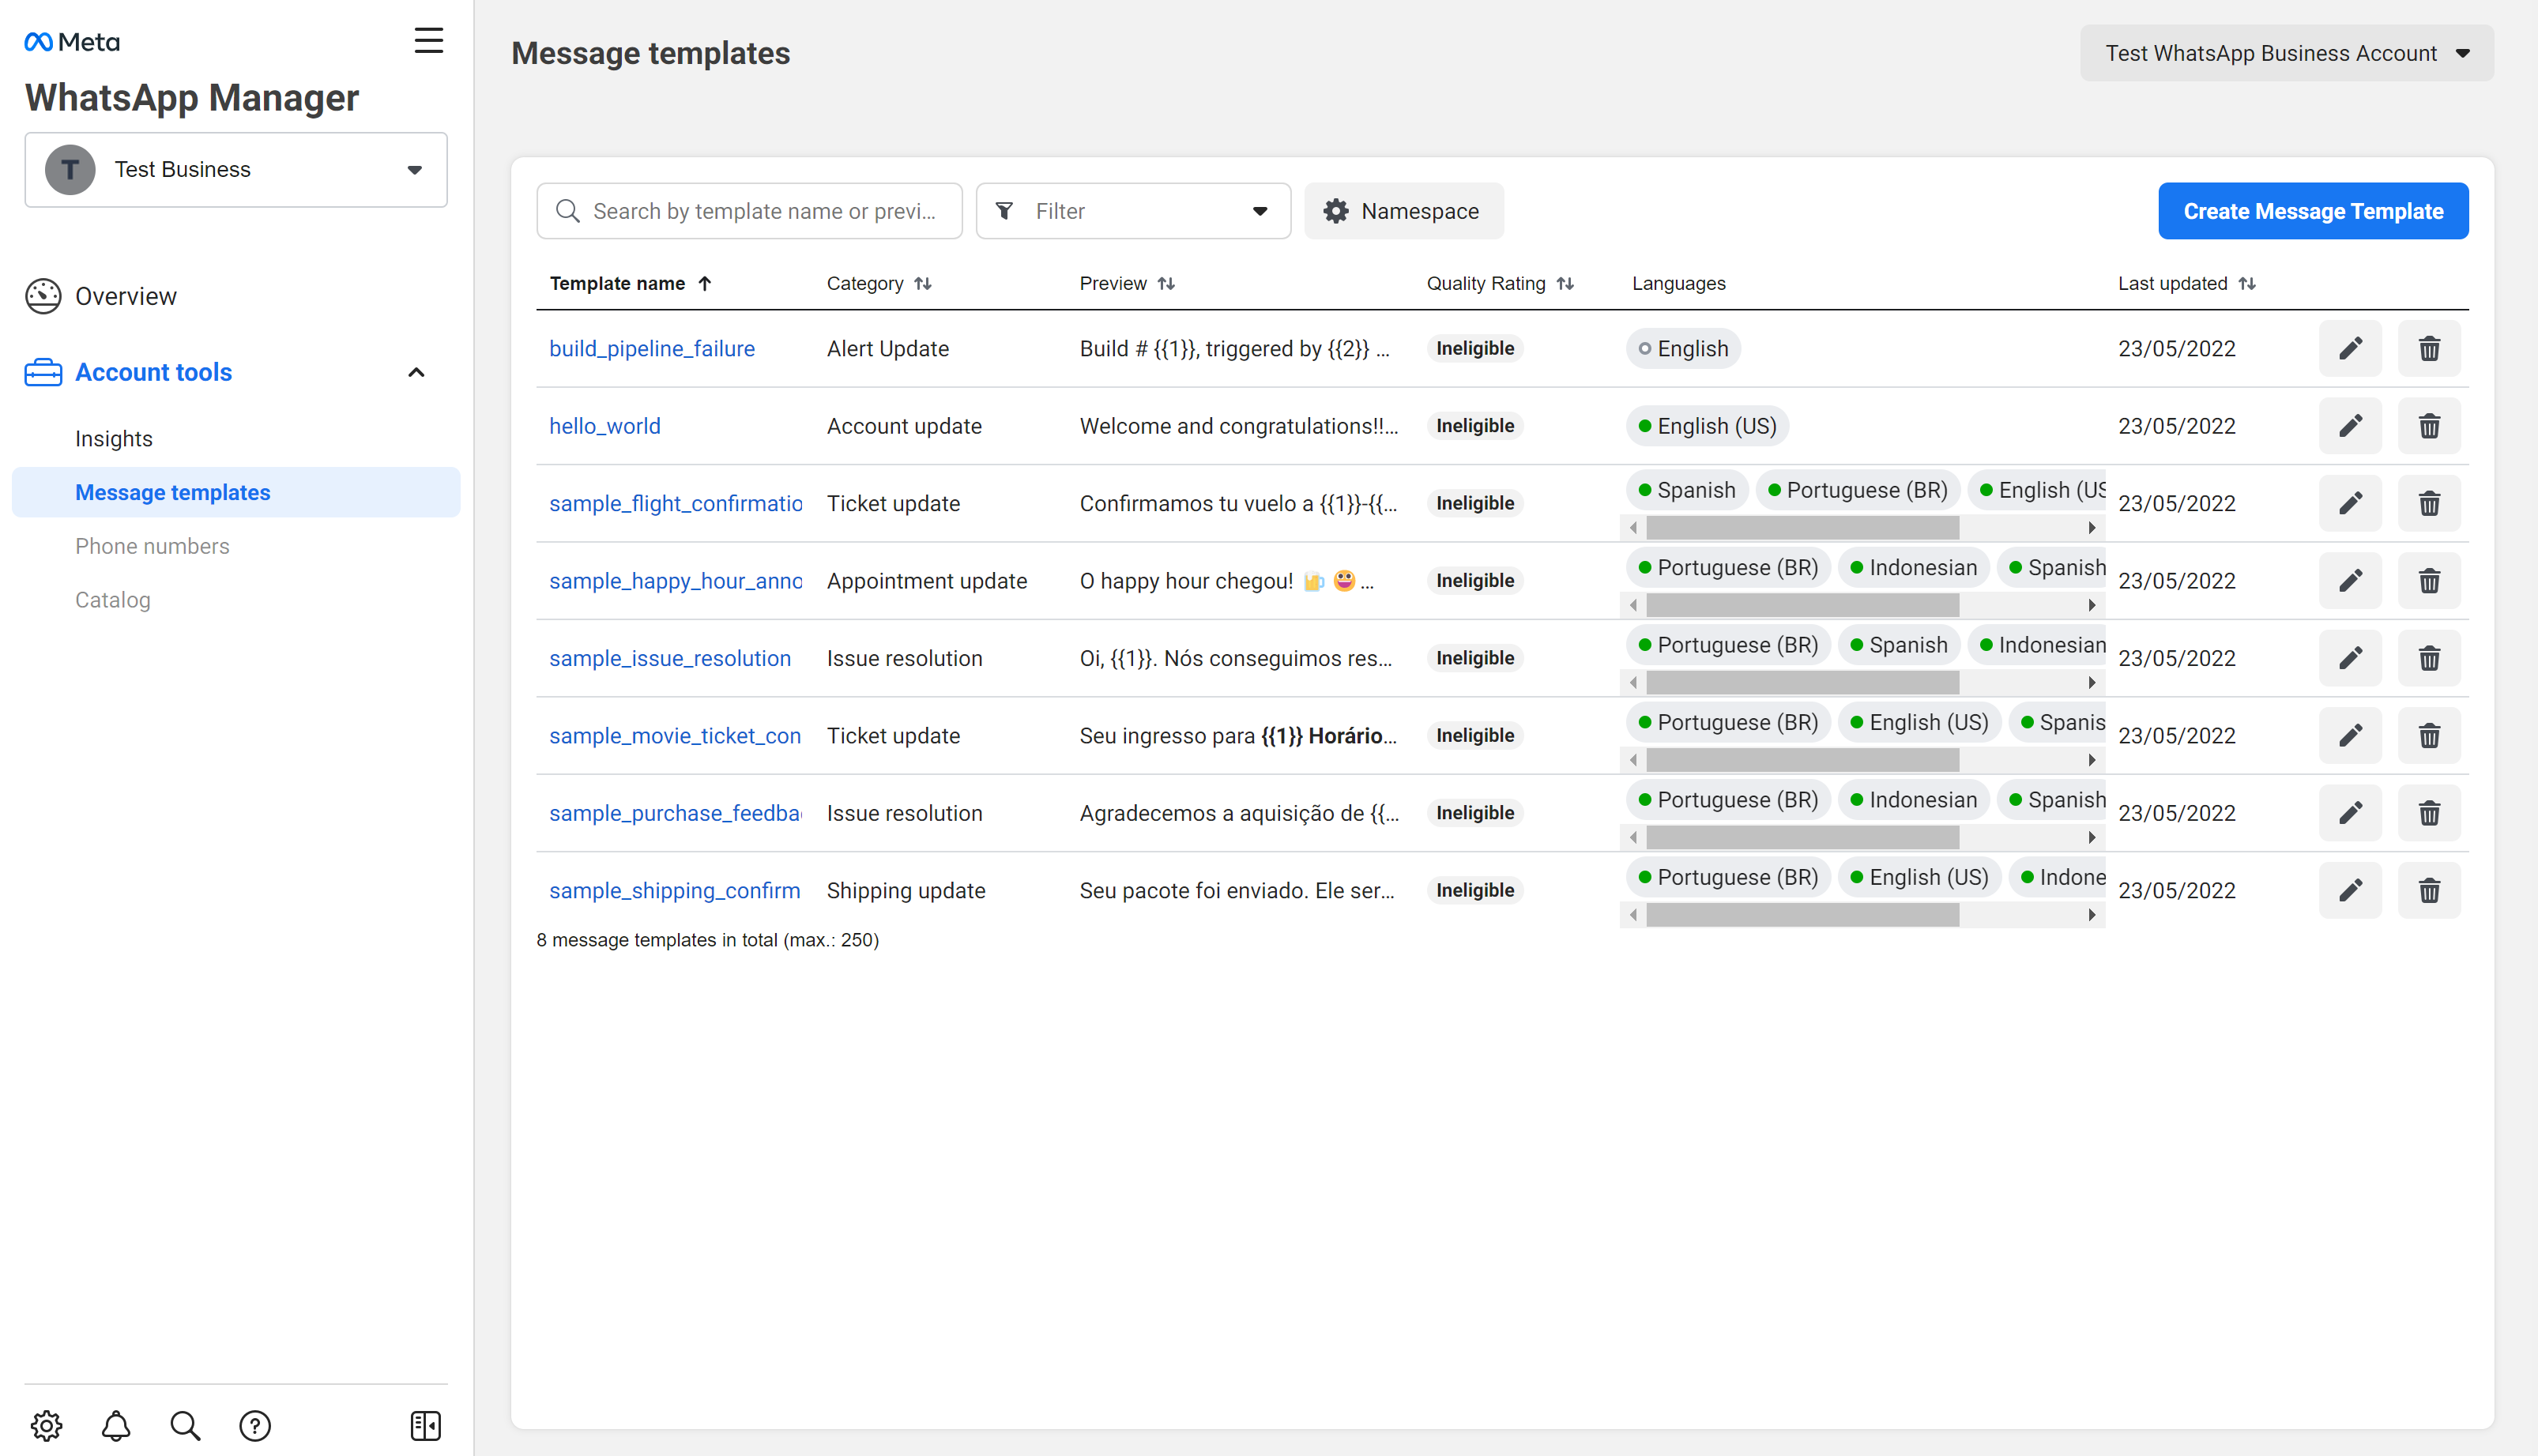
In the test message above, you used the "hello_world" template. You’ll need to set up your own template for your own purposes. If you go to “Message Templates” in the WhatsApp manager you can build your own templates, you can see here we have a number of samples but have also built our own template "build_pipeline_failure":
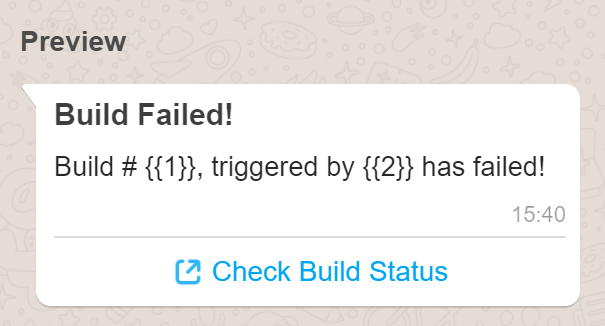
This template has:
- A header informing the user the build has failed
- A body with 2 variables we can dynamically provide for our message so the user knows which build has failed and who it was triggered by
- A call to action link to allow them to go directly to the build status page
Once your template has been approved, you can start to use it!
(Note that it can take up to 48 hours for your template to be approved)
Send your message
Now that you’re all set up, you can send your message.
In our first cell we define our phone number ID, access token and the phone number for our recipient.
phone_number_id = "" # Phone number ID provided
access_token = "" # Your temporary access token
recipient_phone_number = "" # Your own phone number
We’ll then define the URL we’re going to make a POST HTTP request to and the headers for this request.
url = f"https://graph.facebook.com/v13.0/{phone_number_id}/messages"
headers = {
    "Authorization": f"Bearer {access_token}",
    'Content-Type': 'application/json'
}
Now we define the parameters that we’re going to fill in our WhatsApp message.
Here we’re simulating that author “Ben Keen” caused build pipeline number “2022.1” failed:
build_number = '2022.1'
build_author = 'Ben Keen'

msg_body_params = [
        {
            "type": "text",
            "text": build_number
        },
        {
            "type": "text",
            "text": build_author
        }
]
We then use this to fill in the rest of our message body, including which number we’re going to send to, which template we’re going to send to and which language we want our message sent in.
data = {
    'messaging_product': 'whatsapp',
    'to': recipient_phone_number,
    'type': 'template',
    'template': {
        'name': 'build_pipeline_failure',
        'language': {
            'code': 'en'
        },
        'components': [
            {
                'type': 'body',
                'parameters': msg_body_params
            }

        ]
    }
}
Now we make our request by making a POST request with our URL, headers and message body.
import json
import requests


response = requests.post(
    url,
    headers=headers,
    data=json.dumps(data)
)
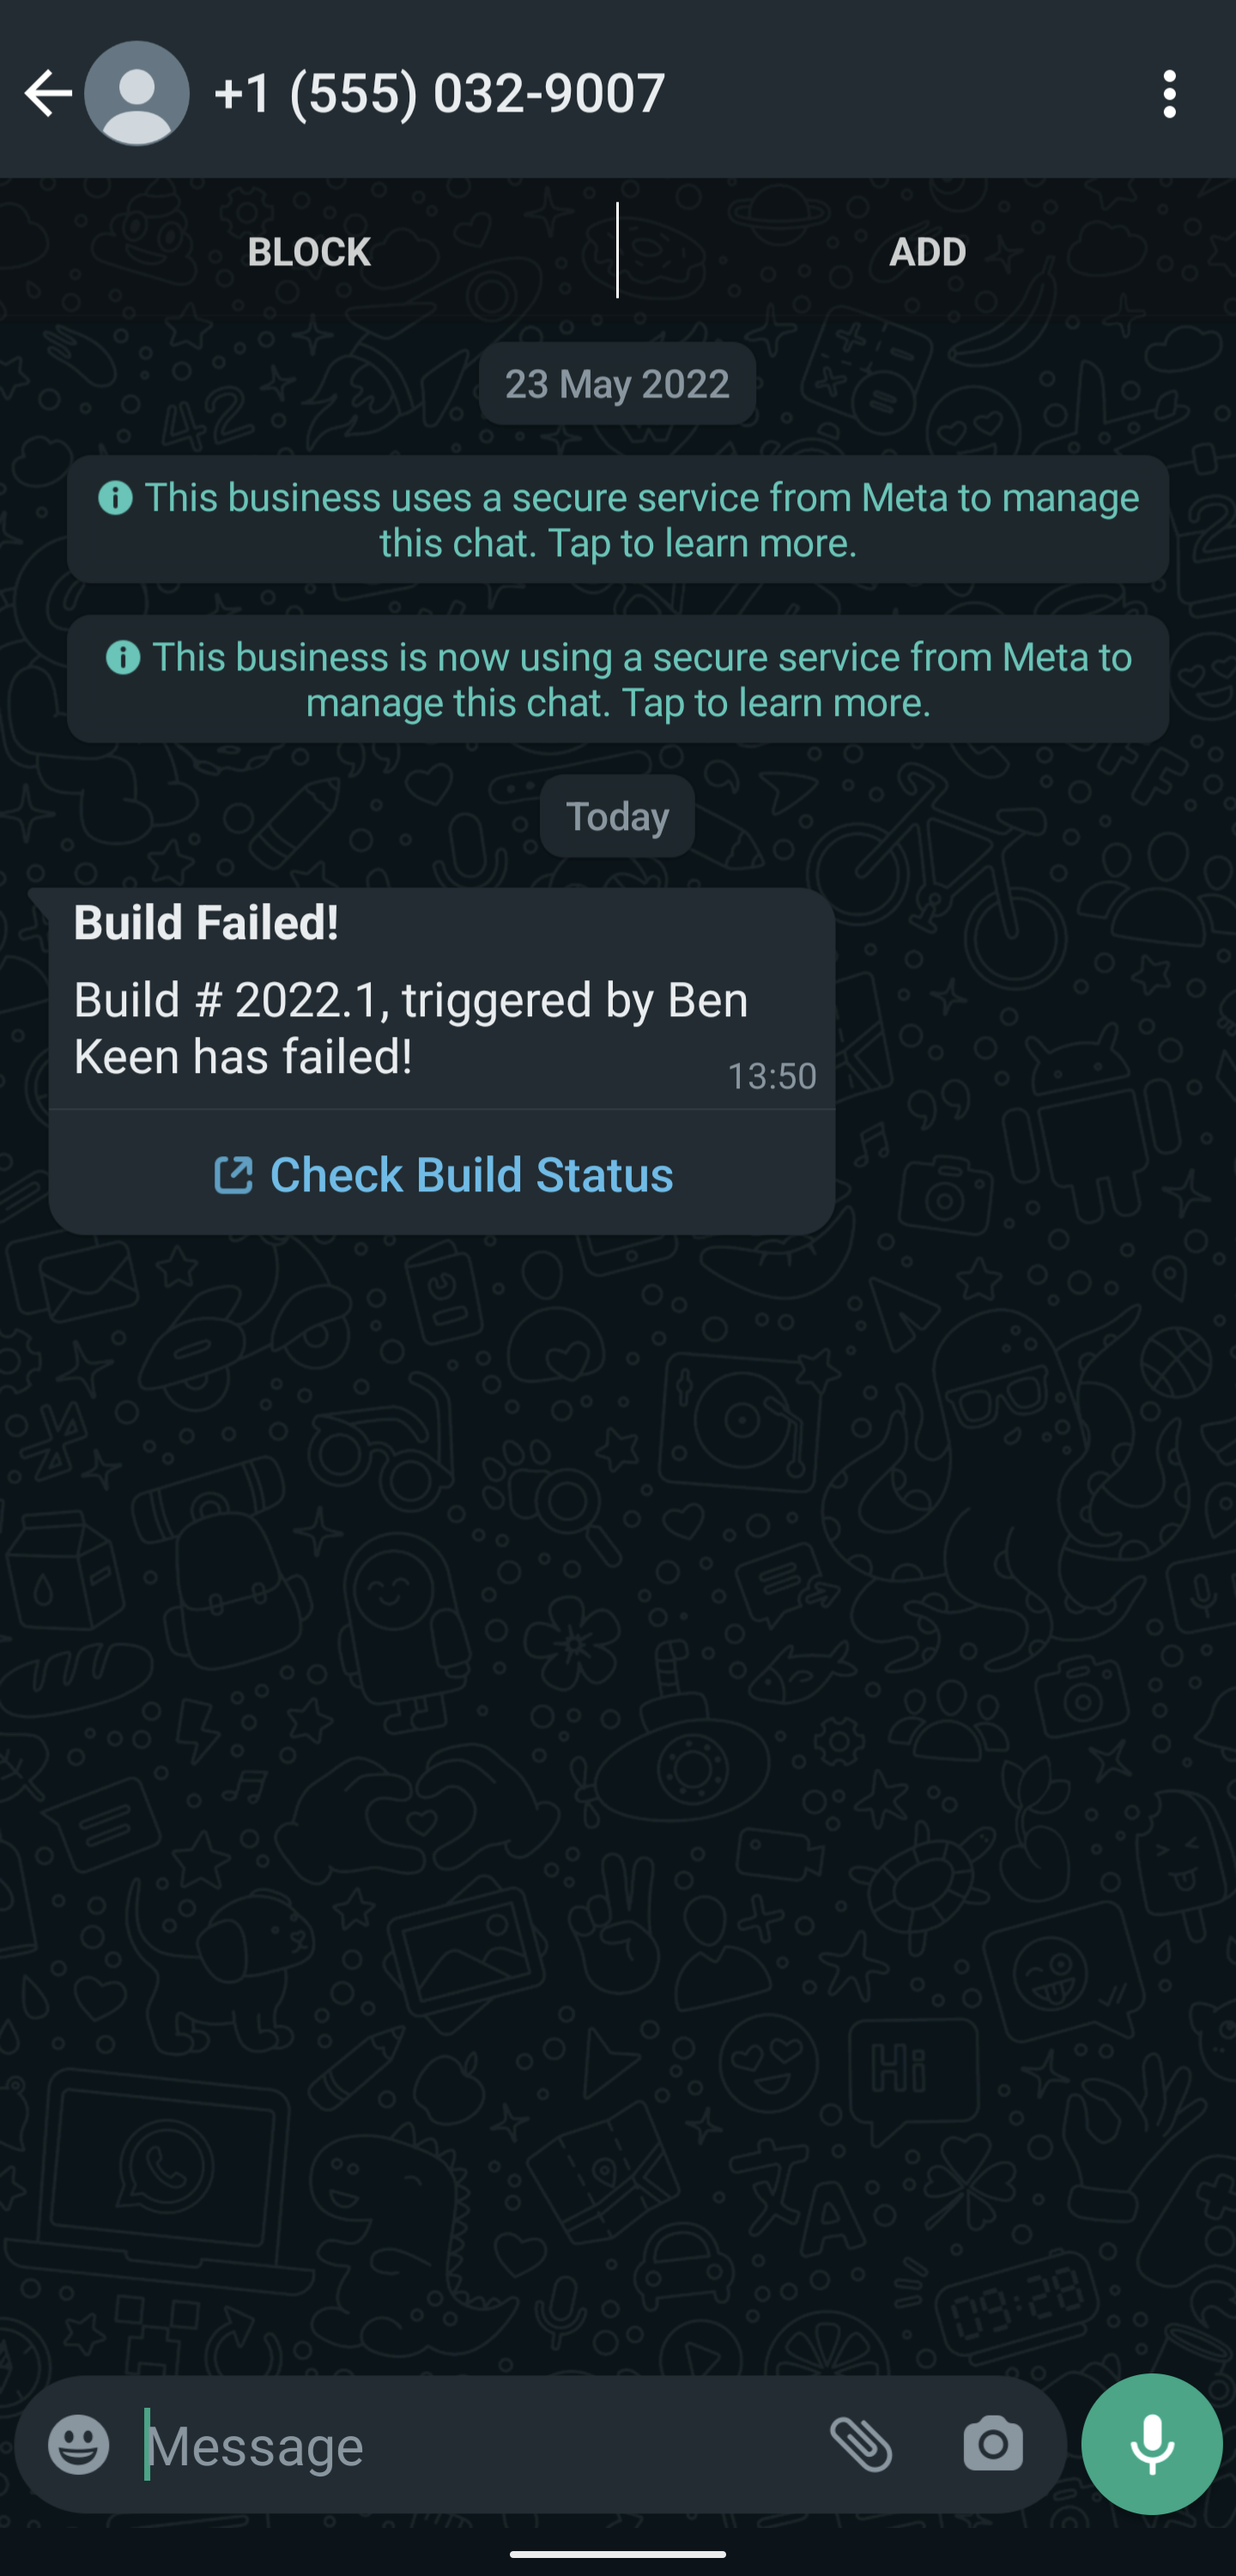
If all goes well we should get a WhatsApp message!
We can also check that we received a 200 HTTP Response Code by running the following:
response.ok
True
And there we have it! A basic demonstration of how we can set up a WhatsApp message template and send a message upon build failure. The below is what I see on my phone: